Theme:

Umbraco Anywhere

Tagged with:
.NET 6
.NET 7
.NET Core
MVC
v10
v9
There has always been a wide array of creative uses for Umbraco; but with Umbraco 10 came .NET 6, SQLite, and true cross-platform support to unlock a whole new world of potential… It’s now possible to run Umbraco directly within a Console App, Azure Function, and even on a variety of mobile devices.

Key Concepts

The IHostBuilder is at the centre of how modern .NET applications are bootstrapped – it provides a way to register dependencies in the IServiceCollection (DI container), and configures the application with IConfiguration during startup.

Regularly all of this magic happens in the 'Program.cs' and 'Startup.cs' files, and Umbraco exposes the same options through its own IUmbracoBuilder / IComposer concepts. Umbraco splits each of the elements needed to boot into handy, granular extension methods. In its most simplistic form Umbraco calls the following:

  • AddUmbraco() – configure logging, hosting environment, and Umbraco Builder
  • AddBackOffice() – register core services, and backoffice routes
  • AddWebsite() – register core services, and front-end routes
  • AddComposers() – load plugin-registered IComposer's

Each of these call further extension methods – e.g. AddUmbracoCore(), AddNuCache(), AddExamine(), AddModelsBuilder(), etc – to configure the application exactly as required. This is particularly helpful in contexts where only some of the out-of-the-box functionality is required, or where a given feature needs to be overridden.
Console App

Console applications are a popular way to run batch, background, or scheduled tasks. Morten Christensen has a popular Umbraco Console App example for Umbraco v6 & v7 but challenges, such as needing files in specific locations, made this approach quite fiddly.

With Umbraco v9+ those days are gone! As console applications can be bootstrapped using the Generic Host Builder, it’s possible to utilise the exact same extension methods as in a web application to register everything needed for Umbraco to run.

Unlike a web application, a console application has no accessible front-end and is not stateful so it’s important to consider registering only what’s required. For example, it’s unnecessary to register the backoffice or front-end routing to simply retrieve data from the Umbraco Service Layer. Similarly, it’s unlikely that components like the content cache or Examine indexes would be needed within a console app (although still possible), as these are both generated every single time the application starts which will significantly slow down boot times.

To start, create a new console application project:

> dotnet new console -name “UmbracoAnywhere.Console”

Next, install Umbraco into the project:

> dotnet add package Umbraco.Cms.Infrastructure

NB: The Umbraco.Cms.Infrastructure package contains 95% of everything required to bootstrap an application, but there are also a few things in Umbraco.Cms.Web.Common that may be required.

In some contexts where ASP.NET is not supported this may cause a problem.

It is also necessary to install a database provider so that Umbraco knows which database to use, such as the SQL Server provider:

> dotnet add package Umbraco.Cms.Persistence.SqlServer

Here in the application’s entry point, Program.cs, the IHostBuilder provides an IServiceCollection and IConfiguration to call the required Umbraco extension methods.


public static class Program
{
    public static void Main(string[] args)
    {
        var host = Host.CreateDefaultBuilder(args)
            .ConfigureUmbracoDefaults()
            .ConfigureServices((context, services) =>
            {
                services
                    .AddUmbraco(context.Configuration)
                    .AddConfiguration()
                    .AddUmbracoCore()
                    .AddUnique<IHostingEnvironment, DefaultHostingEnvironment>()
                    .AddComposers()
                    .Build();
            })
            .Build();
    }
}

Program.cs

The calls to AddUmbraco(), AddConfiguration(), and AddUmbracoCore() are all that are needed to use the same familiar Umbraco service layer and appsettings.json file as in a web application.

The IHostingEnvironment interface shown above is responsible for telling Umbraco how to work with the environment’s file system and may differ depending on the context. Here a basic IHostingEnvironment (that maps all paths to the application root) is used as there is no HttpContext.

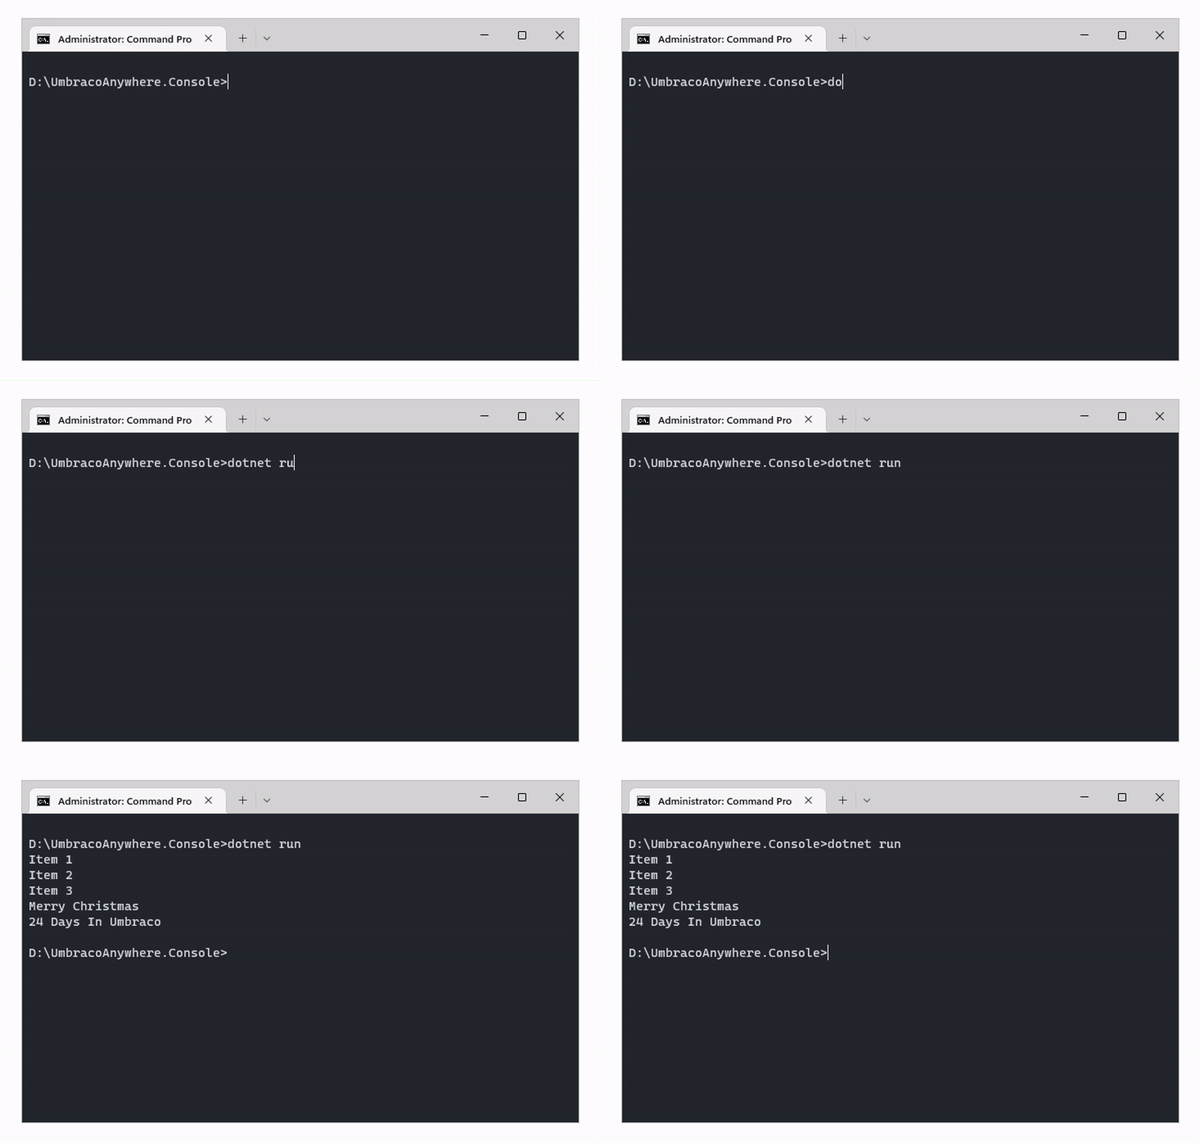
In this example I have created a basic console application that uses Umbraco’s Content Service to output a list of every node name. It’s necessary to use the Content Service here instead of the cache, as the cache would be built each time the app boots.


var contentService = host.Services.GetService<IContentService>();

var items = contentService.GetRootContent()
    .Select(x => x.Name);

foreach (var item in items)
{
    System.Console.WriteLine(item);
}

Console.cs

Console app outputs the list of root node names

Azure Functions

Serverless or FaaS (function as a service) platforms are a mainstay of modern cloud applications. Azure Functions natively supports C# – and whilst it doesn’t give direct control over the boot pipeline it is still possible to modify the IFunctionsHostBuilder and register Umbraco.

First, install the Azure Functions dotnet templates:

> dotnet new -i Microsoft.Azure.WebJobs.ProjectTemplates

Next, create a new Azure Functions project:

> dotnet new azurefunction -name “UmbracoAnywhere.Function”

As before, install Umbraco into the project:

> dotnet add package Umbraco.Cms.Infrastructure

And install Umbraco’s SQL Server provider:

> dotnet add package Umbraco.Cms.Persistence.SqlServer

With a few minor syntactic differences, the process for registering Umbraco is almost identical to a console application – register services in the application builder and use the very same appsettings.json file. To modify the IFunctionsHostBuilder, create a class that extends the FunctionsStartup class and applying a FunctionsStartup assembly attribute.


[assembly: FunctionsStartup(typeof(Startup))]

public class Startup : FunctionsStartup
{
    public override void Configure(IFunctionsHostBuilder builder)
    {
        builder.Services
            .AddUmbraco(builder.GetContext().Configuration)
            .AddConfiguration()
            .AddUmbracoCore()
            .AddUnique<IHostingEnvironment, DefaultHostingEnvironment>()
            .AddComposers()
            .Build();
    }
}

Startup.cs

Because Azure Functions supports dependency injection out-of-the-box it is possible to inject the core Umbraco services into any Function class, such as a HTTP triggered (web API), timer triggered (scheduled), or event triggered Function.

In this example I have created an HTTP trigger following the exact same principles and code as in my console application – this time leveraging dependency injection.


public class Function
{
    private readonly IContentService _contentService;

    public Function(IContentService contentService)
    {
        _contentService = contentService;
    }

    [FunctionName("GetItems")]
    public async Task<IActionResult> Run([HttpTrigger(AuthorizationLevel.Anonymous, "GET", "POST", Route = null)] HttpRequest req, ILogger log)
    {
        var items = _contentService.GetRootContent()
            .Select(x => x.Name);

        return new OkObjectResult(items);
    }
}

Function.cs

Cross-platform (MAUI) App

Microsoft’s MAUI (formerly known as Xamarin) is a powerful cross-platform framework for building mobile (iOS / Android), desktop (Windows / MacOS), and smartwatch (Apple Watch) applications. Whilst these operating systems bring a new world of complexity, MAUI runs the same familiar .NET platform and so makes it possible to write applications with C#... and therefore run Umbraco!

First create a new MAUI project – this targets iOS and Android by default:

> dotnet new maui -name “UmbracoAnywhere.Maui”

Again, install Umbraco into the project:

> dotnet add package Umbraco.Cms.Infrastructure

And install Umbraco’s SQL Server provider:

> dotnet add package Umbraco.Cms.Persistence.SqlServer

A MAUI app consists of one or many “Pages” with XAML with a corresponding code-behind class – conceptually similar to RazorPages, or a view + controller in MVC – plus a MauiProgram class which is the entrypoint for the application.

The MauiProgram utilises a MauiAppBuilder to bootstrap the application. As with other IHostBuilder classes, this can be used to configure the IServiceCollection and IConfiguration for the application. The same approach as before can be used to register Umbraco, but MAUI’s file system abstraction differs and so an alternative IHostingEnvironment needs to be registered.


public static class MauiProgram
{
    public static MauiApp CreateMauiApp()
    {
        var builder = MauiApp.CreateBuilder();

        builder.UseMauiApp<App>();

        builder.Services
            .AddUmbraco(builder.Configuration)
            .AddConfiguration()
            .AddUmbracoCore()
            .AddUnique<IHostingEnvironment, MauiHostingEnvironment>()
            .AddComposers()
            .Build();

        return builder.Build();
    }
}

MauiProgram.cs

By default MAUI does not load the standard appsettings.json file, but this can be manually applied in the MauiAppBuilder also:


var appsettingsManifest = Assembly.GetExecutingAssembly()
    .GetManifestResourceNames()
    .FirstOrDefault(x => x.EndsWith("appsettings.json"));

if (appsettingsManifest != null)
{
    using (var stream = Assembly.GetExecutingAssembly().GetManifestResourceStream(appsettingsManifest))
    {
        var config = new ConfigurationBuilder().AddJsonStream(stream).Build();

        builder.Configuration.AddConfiguration(config);
    }
}

MauiProgram_appSettings.cs

As the Android and iOS platforms both ship with SQLite support by default, it is possible to embed a database within an application as a MauiAsset. Much like for SQL Server, Umbraco requires an additional NuGet package to support SQLite:

> dotnet add package Umbraco.Cms.Persistence.Sqlite

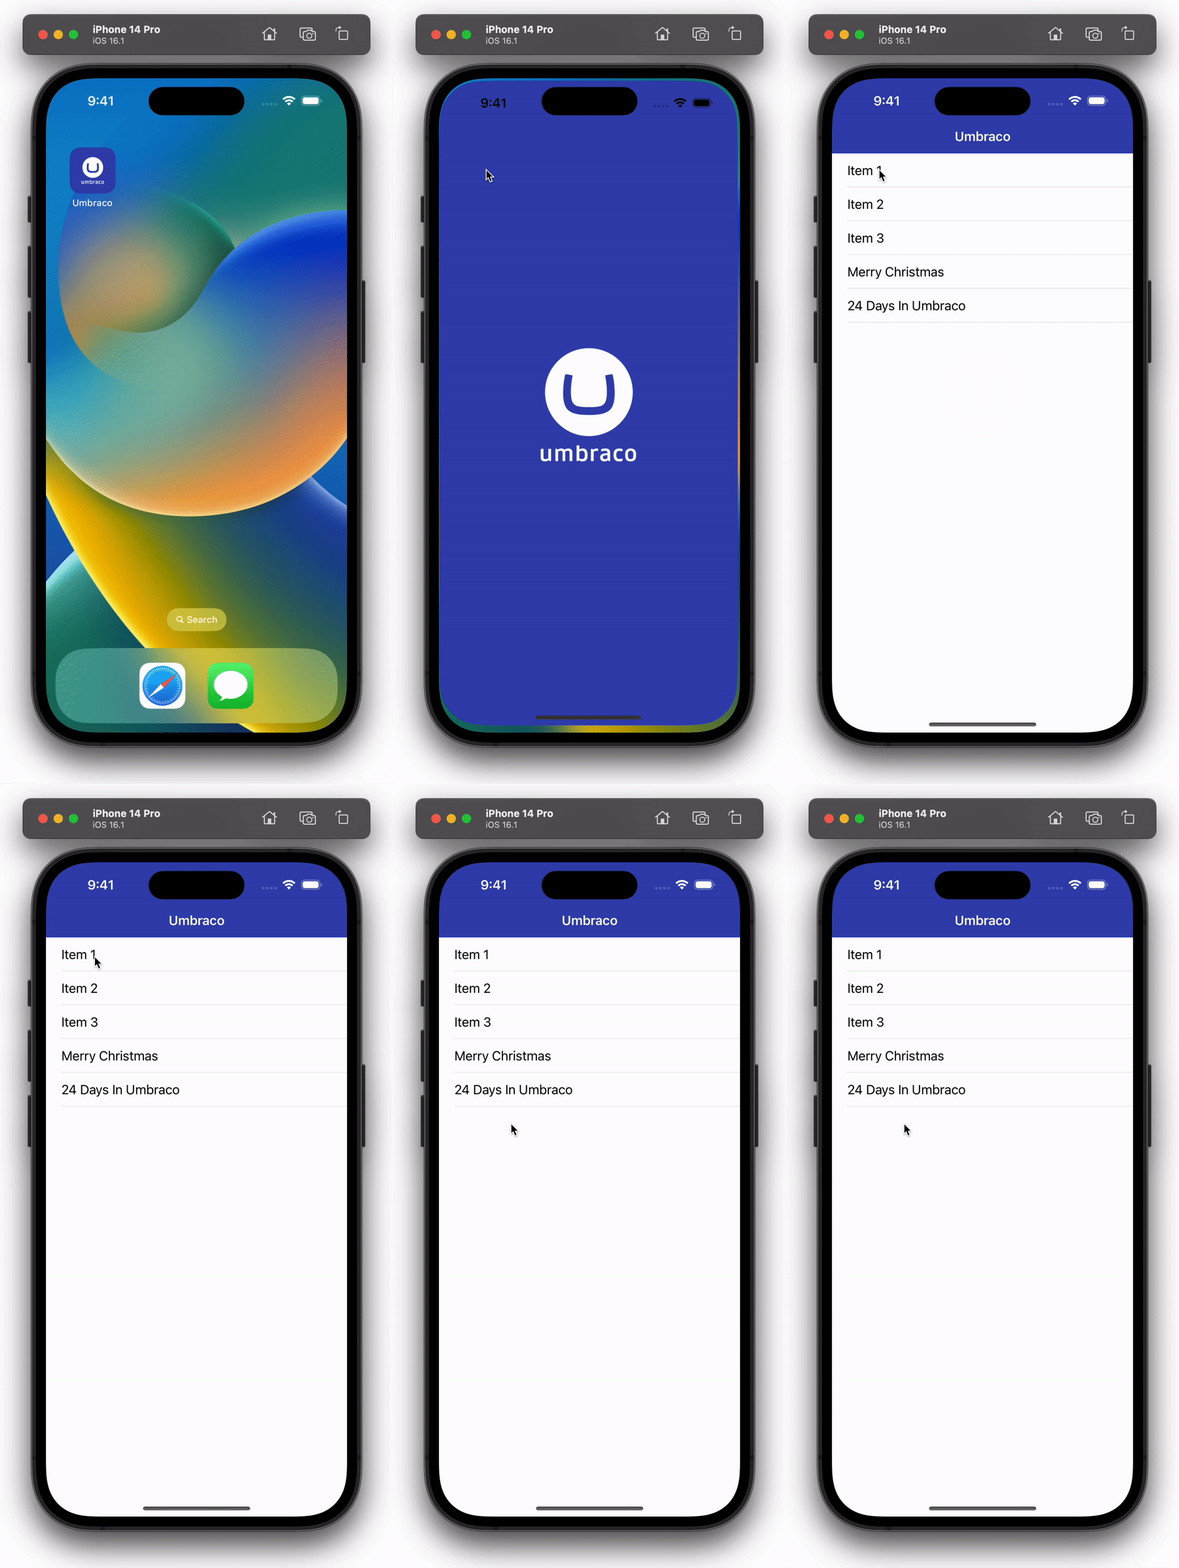
In this example I have created an iOS MAUI app with Umbraco installed, plus a sprinkle of UI sugar on top. Upon launching the app Umbraco will boot, connect to the database, and load the same list of content items into a “list view” once initialized. I am certainly not a mobile app developer, but found it relatively straightforward getting started using Visual Studio for Mac + XCode for an emulator.


public partial class MainPage : ContentPage
{
    private readonly IContentService _contentService;

    public MainPage(IContentService contentService)
    {
        _contentService = contentService;

        InitializeComponent();
    }

    protected override void OnAppearing()
    {
        var collection = new ObservableCollection<ListViewItem>();

        var items = _contentService.GetRootContent();

        foreach (var item in items)
        {
            collection.Add(new ListViewItem
            {
                Name = item.Name
            });
        }

        ItemListView.ItemsSource = collection;
    }
}

MainProgram.cs

IOS app outputs the list of root node names

Source code

I hope these samples can be used as a base for running Umbraco in alternative contexts – let me know what you achieve! A repo with full working examples can be found on GitHub.


Tech Tip: JetBrains Rider

Check it out here