Sometimes you need to see your site exactly as a member sees it. In this article, I walk through the process of creating the Umbraco package MemberImpersonation. The package enables secure member impersonation, from a minimal server-side API to a backoffice entity action wired with manifests, and a small front-end UI using UUI outside the backoffice. If you want a beginner‑friendly path from idea to something others can install, this is for you.
From Idea to Package: Building Member Impersonation for Umbraco backoffice
- Tagged with:
- Backoffice
- Members
- v16
The idea
I wanted a way for a backoffice user (with the right permissions) to impersonate a front‑end member. Two common use cases:
- From the backoffice: find and select a Member and click “Impersonate…”
- From the website: browse as a specific member to reproduce reported issues
Step 1: Server‑side impersonation logic
I started with simple server logic to sign in/out using Umbraco’s MemberSignInManager. The important part is that only authorized backoffice users can impersonate, and they can stop impersonating at any time.
Here’s the core service. It uses Umbraco’s member managers and checks the current backoffice user for a permission. IsAllowedToImpersonate is my own implementation, which is a check of current user is logged in to backoffice and allowed to member section:
public ImpersonationMemberSignInManager(IMemberSignInManager memberSignInManager,
    IBackOfficeSecurityAccessor backOfficeSecurityAccessor, IMemberManager memberManager)
{
    _memberSignInManager = memberSignInManager;
    _backOfficeSecurityAccessor = backOfficeSecurityAccessor;
    _memberManager = memberManager;
}
public async Task<SignInResult> SignInAsync(string userId)
{
    var user = await _memberManager.FindByIdAsync(userId);
    if (user == null)
    {        return SignInResult.Failed;
    }
    if (_backOfficeSecurityAccessor.BackOfficeSecurity?.CurrentUser?.IsAllowedToImpersonate() != true)
    {        return SignInResult.Failed;
    }
    await _memberSignInManager.SignInAsync(user, false);
    return SignInResult.Success;
}
public async Task<SignInResult> SignOutAsync()
{
    if (_backOfficeSecurityAccessor.BackOfficeSecurity?.CurrentUser?.IsAllowedToImpersonate() != true)
    {        return SignInResult.Failed;
    }
    await _memberSignInManager.SignOutAsync();
    return SignInResult.Success;
}
I exposed this through a backoffice API controller with two endpoints:
[HttpPost("Impersonation/{memberKey}")]
[ProducesResponseType<string>(StatusCodes.Status200OK)]
public async Task<ActionResult> Impersonation(string memberKey)
{
    var result = await _impersonationMemberSignInManager.SignInAsync(memberKey);

    if (result.Succeeded)
    {        return Ok("Successfully impersonated");
    }
    return BadRequest("Failed to impersonate");
}

[HttpPost("StopImpersonation")]
[ProducesResponseType<string>(StatusCodes.Status204NoContent)]
public async Task<ActionResult> StopImpersonation()
{
    var result = await _impersonationMemberSignInManager.SignOutAsync();

    if (result.Succeeded)
    {        return Ok("Stopped impersonation");
    }
    return BadRequest("Failed to stop impersonation");
}
Step 2: Where should the UI live?
With the core functionality in place, I implemented two UIs:
1. Backoffice: an Entity Action ('Tree Action' in Umbraco 13) on a Member to start impersonation
2. Front‑end: a small button/notice to stop impersonation and a way to “try as member” while browsing
Step 3: My first manifest
I started in the Client folder of my project. The entity action below adds an “Impersonate…” option to the Member entity. TypeScript was helpful for discovering properties like type, kind, and meta.
If youre wondering what the "Client" folder is you can check it out here. The client folder contains the source code for the extension and is created when you start you project from Umbraco template.
The reason i chose an entity action is because it integrates seamlessly into the backoffice user’s existing workflow. It is also important to note the forEntityTypes field, as it ensures it is only visible on the member page!
const entityAction: UmbExtensionManifest = {
  type: "entityAction",
  kind: "default",
  alias: "member.entity.action",
  name: "member action",
  weight: 1,
  forEntityTypes: [UMB_MEMBER_ENTITY_TYPE],
  api: ImpersonateMember,
  meta: {
    icon: "icon-operator",
    label: "Impersonate...",
  },
  conditions: [MemberSectionCondition, AccessToSensitiveDataCondition],
};

export const manifests = [entityAction];
/Client/backoffice/member.manifests.ts
I quickly discovered that conditions are easy to duplicate. I pulled shared ones into a constants module. The match value isn’t strongly typed, so finding the correct section was trickier than expected. I first looked at the URL (/section/member-management) but the right value came from the data-mark on the uui-tab: section-link:Umb.Section.Members. I also created a custom condition for the current user because there was no built‑in condition to check access to sensitive data.
export const MemberSectionCondition = {
  alias: 'Umb.Condition.SectionAlias',
  match: 'Umb.Section.Members',
};

export const AccessToSensitiveDataCondition = {
  alias: 'Umb.Condition.CurrentUser.HasAccessToSensitiveData',
};
With that, I had a working backoffice extension for impersonating a member. Next, I wanted a ready‑to‑use front‑end UI for Razor.
Note
I also created a modal element that finds all mapped domains for the current site and redirects after impersonation succeeds. The implementation is here.
Step 4: The minimal front‑end implementation
I wanted the front‑end button/notice to look native and use Umbraco’s colors and UI. The @umbraco-ui/uui package is perfect for doing so but because it is implemented with Lit, it is easier to use it inside a custom element.
I implemented a small Web Component (custom element), registered it as <umb-act-toggle> and loaded it via an ES module. It was important for me that this part of the package is optional, so it should only be loaded if the user of the package adds the following snippets.
Because the Web Component is created inside a Razor partial, it is possible to take advantage of the built in security for backoffice and inject the IBackofficeUserAccessor into the partial to make a check if BackOfficeSecurity.BackofficeUser.IsAuthenticated, else do not show the UI for impersonation. This saved me from adding custom authentication calls in the web component, as it is handled in Razor before showing the component.
<script type="module" src="~/scripts/impersonation.main.js" asp-append-version="true"></script>
<body>
  <content> @await Html.PartialAsync("Umbraco.Community.MemberImpersonation/ImpersonationText")
    @RenderBody()
</content>
  @await Html.PartialAsync("Umbraco.Community.MemberImpersonation/ImpersonationUI")
</body>
So how is this accomplished? Inside the package, the package.json depends on lit and @umbraco-ui/uui, which is built into wwwroot, so it can be accessed in the web page.
"scripts": {
"build:js": "cross-env ... outdir=./wwwroot/scripts",
...
},
"devDependencies": {
"lit": "^3.3.1",
"@umbraco-ui/uui": "^1.14.2",
"@umbraco-ui/uui-css": "^1.14.1",
...
}
What actually is added to the page is some lit components that uses the Umbraco Management Api and fetch members with search and ordering function. Exactly as in backoffice, now also in the websites frontend.
As seen below this can be rendered in a uui-scroll-container, also where umb-act-search-result-item is a uui-icon with the member icon and the members email. The member list is updated from the Umbraco Management Api when search or filters change.
  async getMemberItems() {
    const {response, data} = await MemberService.getFilterMember({
      query: this.filters,
      headers: {
        Authorization: 'Bearer ' + this.userAuth.access_token
      }
    });

    if (response.ok) {
      this.items = data.items;
      this.requestUpdate('items');
    }
  }

<uui-scroll-container>
    ${this.items.map(item => html`
        <umb-act-member-item-actions .item=${item}>
            <umb-act-search-result-item .item="${item}"/>
        </umb-act-member-item-actions>`
    )}
</uui-scroll-container>
Small snippet from Lit
Step 5: Publishing
Now that the package was done the last thing was to make it easy for me (and the community) to use it. I started out using this template, and now i knew why: it ensures NuGet metadata (description, tags, license, title) is correctly filled so it’s ready to publish as a package. I updated the fields to fit my package and bundled the web component so the assets end up in wwwroot. The template also helps with building and publishing with the prefilled files (csproj / umbraco-package.json).
All that said, the job is not completely done from here. I use GitHub to store and manage releases, with a YAML workflow under .github/workflows that triggers on pushed tags matching semantic versioning (e.g., 1.2.3). The workflow builds, packs, and publishes to NuGet.
on:
  push:
    tags:
      - "[0-9]+.[0-9]+.[0-9]+"

jobs:
  build:
    ...
    steps:
      Checkout repository & Setup .NET...

      - name: Build & Pack
        run: dotnet pack src\Impersonation\Impersonation.csproj -c Release /p:Version=${{github.ref_name}}
      - name: Push to NuGet
        run: dotnet nuget push **\*.nupkg -k ${{secrets.NUGET_API_KEY}} -s https://api.nuget.org/v3/index.json
.github/workflows/release.yml
The snippet also publishes to nuget, so it is then available using dotnet add package Umbraco.Community.MemberImpersonation.
At last Github will give you a good overview of which version and what the latest release is.
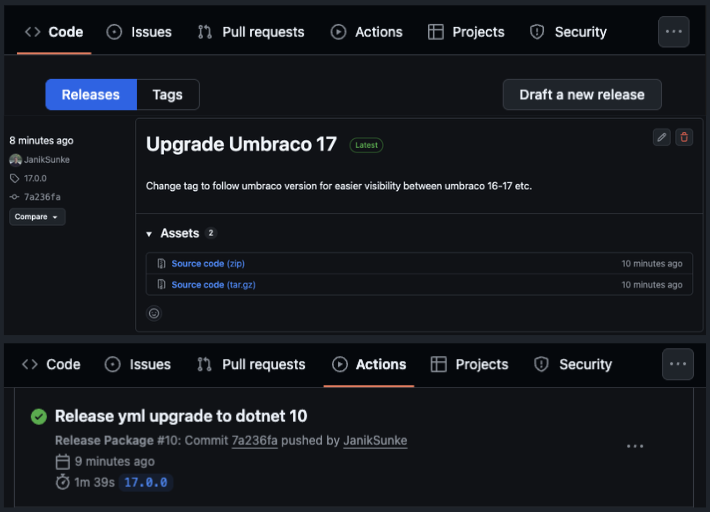
Github Overview
Sum up
I hope this article has given you a clear insight at how I went from an idea to a working, installable Umbraco package. One of most important thing for this package is security: checking that the user has the rights to impersonate. Using Umbraco / .Net built-in security makes it easier to maintain a high level of security without implementing custom security checks. Another important aspect is the UI. Choosing Umbraco UUI keeps the interface consistent.
A good addition to the package would be adding audit logging when impersonation starts/stops (user id, member id, timestamp). It could be some kind of dashboard or new log level, so it doesn’t fill up important system logs.
- Link to the package on the Umbraco Marketplace:
https://marketplace.umbraco.com/package/umbraco.community.memberimpersonation - Link to the source repository:
https://github.com/JanikSunke/Umbraco-Member-Impersonation
