Enhancing the Content Editor Experience

tagged with Backoffice Content

“Umbraco is terrible!”


Chances are that if you have been working in the CMS world for any length of time, at some point you have had a content editor say this - or something similar - to you. Blasphemy!  How dare anyone disparage our beloved Umbraco?! Umbraco is perfect in every way! Joking aside, what they likely mean (without realizing it) is that they dislike the way their instance of Umbraco is implemented.

This is not limited to Umbraco but can be said of nearly every CMS. Without an organized, easy to understand content structure and a well thought out editing experience, using any CMS can be frustrating at best and nearly impossible at worst. The content editing experience goes a long way towards making editors love, or at least not hate, their CMS. There are a variety of ways to improve the content editing experience and make content editors’ lives easier – organized, structured and reusable content; custom data types and editor controls; clear and concise naming conventions – to name a few.

While reusable content is great and customized editing controls can be tailored to editors’ exact needs, there isn’t always time or budget to spend on extensive customization.  Additionally, we don’t always have the luxury of reorganizing the entire content structure of a site and not all content needs to be reusable - sometimes you just need a block of content!

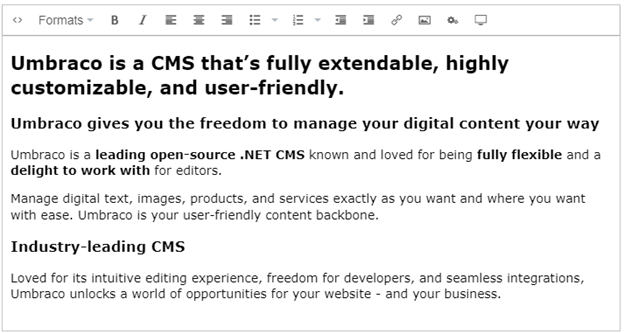
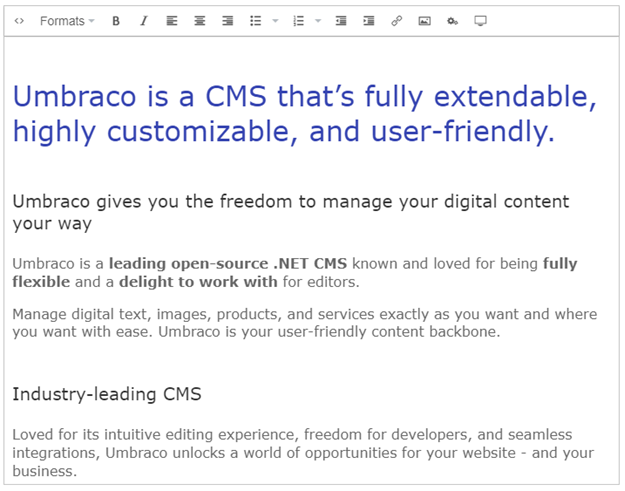
The good news is that there are some tools you can use to make your content editors’ lives easier with very little effort – rich text editor stylesheets and macros (blocks).

Rich text editor styles sheets

Adding a stylesheet that matches the overall site styles to the rich text editor can significantly improve the content editing experience as well as expedite the editing process. Umbraco makes it extremely easy to customize the HTML text formats which are available in the rich text editor as well as preview the text in the RTE with these styles applied.  By allowing editors to see a preview of the content directly in the RTE, editors save time switching back and forth between editing and previewing thus eliminating frustration and increasing efficiency. 

To add an RTE stylesheet:

In the Backoffice

  1. Navigate to the Settings section.
  2. Right click on “Stylesheets” in the Templating section and select the option to create a new Rich Text Editor style sheet file.
  3. Enter “wysiwyg” as the name and click Save.
  4. Paste the following code snippet into the empty CSS file and save.

h1, h2, h3, h4, h5, h6,
.h1, .h2, .h3, .h4, .h5, .h6 {
	font-weight: 400;
	line-height: 1.25;
	color: #3544b1;
	margin: 3rem 0 1.5rem;
}
h1, .h1 {
	font-size: 2.25rem;
	font-weight: 700;
}
h2, .h2 {
	font-size: 2rem;
	font-weight: 300;
}
h3, .h3 {
	font-size: 1.25rem;
	font-weight: 500;
	color: #333333;
}
h4, .h4 {
	font-size: 1.125rem;
	font-weight: 500;
	color: #333333;
	letter-spacing: 1px;
	text-transform: uppercase;
}
h5, .h5 {
	font-size: 1rem;
	color: #333333;
	font-weight: 500;
	letter-spacing: 1px;
	text-transform: uppercase;
}
h6, .h6 {
	font-size: .875rem;
	color: #333333;
	font-weight: 500;
	letter-spacing: 1px;
	text-transform: uppercase;
}
p {
	font-size: 1rem;
	color: #666666;
}
hr {
	margin-top: 1.5rem;
	border: none;
	border-top: 1px solid #f3f3f3;
}
a {
	color: #3544b1;
	text-decoration: none;
}
a:hover { color: #666666; }
p { font-size:1rem; }

/**umb_name:H1*/
h1 {
}
/**umb_name:H2*/
h2 {
}
/**umb_name:H3*/
h3 {
}
/**umb_name:H4*/
h4 {
}
/**umb_name:H5*/
h5 {
}
/**umb_name:H6*/
h6 {
}
/**umb_name:Normal Text*/
p {
}
  1. Edit the Rich Text Editor data type and select the new wysiwyg stylesheet in the “Stylesheets” section and save.
  2. Add additional rich text styles relevant to your site. Note that the keys to getting the style to appear in the “Formats” list in the RTE are the /**umb_name:H1*/ comments and corresponding empty style rules at the bottom of the file so be sure to create these entries for any site specific styles you would like as options in the list.
  3. Use the new options in the rich text editor!

Turn this....

...into this!

Macros

Another powerful tool available for enhancing the rich text editor experience is the ability to make code snippets, particularly HTML code, available within the text editor using macros. While the possibilities with macros are endless, two of my favorites are a button and an image with a stylized caption.  These are both simple to build yet provide tremendous value to content editors.  These two items provide the ability to intersperse stylized elements within blocks of content without writing HTML code and without having to break rich text content into multiple blocks.

RTE Button

Editors often want to highlight a call to action within a block of text. In this instance, the ability to quickly insert a styled button can be useful. To create a button which can be used in the rich text editor, do the following:

In the Code

  1. Create a partial view called “inlineButton.cshtml” in the \Views\MacroPartials folder using the following code snippet:

@inherits Umbraco.Cms.Web.Common.Macros.PartialViewMacroPage
@{
	var buttonText = Model.GetParameterValue<string>("buttonText", "");
	var internalPage = Model.GetParameterValue<IPublishedContent>("linkToInternalPage");
	var buttonLink = internalPage == null ? Model.GetParameterValue<string>("linkToExternalUrl", "") : internalPage.Url();
	var buttonOpenInNewWindow = Model.GetParameterValue<bool>("openInNewWindow", false);
}
<a class="btn btn-primary" href="@buttonLink" target="@(buttonOpenInNewWindow ? "_blank" : "_self")">@buttonText</a>

In the Backoffice

  1. Navigate to the Settings section.
  2. Right click on the “Macros” folder and select the option to create a new macro.
  3. Enter a name for the macro such as “Inline Button” and create the macro.
  4. Select the partial view created above in the “Macro partial view” field.
  5. Select the Editor Settings option to “Use in rich text editor and the grid.”
  6. Optionally choose the Editor Settings option to “Render in rich text editor and the grid.” This will display the button element in the editor rather than a macro placeholder.
  7. Adjust cache settings as desired.
  8. Switch to the Parameters tab and create parameters for the following:
    1. Button Text - Textbox
    2. Link to Internal Page - Content Picker
    3. Link to External Url - Textbox
    4. Open in New Window? - Toggle
  9. Save.

To use the button in the rich text editor

  1. Edit a page with a rich text editor.
  2. Decide where in rich text to insert a button and click the “Insert Macro” RTE menu option.
  3. Choose the “Inline Button” macro and configure the button.
  4. Save and preview the page and view your new button!

RTE Image

Content editors will sometimes want to add a caption below a photo to provide photo credit or other information.  Often something which seems like it should be simple can throw off the entire layout of the text.  Providing editors with a way to insert an image with a caption can prevent a great deal of frustration as well as ensure consistent styling (padding, margin, use of borders, etc.) of images throughout the site. Here’s how to add an image with a caption to the RTE:

In the Code

  1. Create a partial view called “inlineImage.cshtml” in the \Views\MacroPartials folder using the following code snippet:

@inherits Umbraco.Cms.Web.Common.Macros.PartialViewMacroPage
@{
	var imageUrl = string.Empty;
	@if (Model.MacroParameters["image"] != null)
	{
		var image = Umbraco.Media(Model.MacroParameters["image"]);
		imageUrl = image?.Url();
	}
	
	var caption = Model.GetParameterValue<string>("caption", "");
	var widthParam = Model.GetParameterValue<int>("width", 0);
	var heightParam = Model.GetParameterValue<int>("height", 0);
}
@if (!string.IsNullOrEmpty(imageUrl))
{
	@if (widthParam > 0 && heightParam > 0)
	{
		<img src="@imageUrl" width="@widthParam" height="@heightParam" style="width:@(widthParam)px;height:@(heightParam)px;" />
	}
	else
	{
		@if (widthParam > 0)
		{
			img src="@imageUrl" width="@widthParam" style="width:@(widthParam)px;" />
		}
		if (heightParam > 0)
		{
			<img src="@imageUrl" height="@heightParam" style="height:@(heightParam)px;" />
		}
	}
}
@if (!string.IsNullOrEmpty(caption))
{
	<div>
		<small>@caption</small>
	</div>
}

In the Backoffice

    1. Navigate to the Settings section.
    2. Right click on the “Macros” folder and select the option to create a new macro.
    3. Enter a name for the macro such as “Inline Image” and create the macro.
    4. Select the partial view created above in the “Macro partial view” field.
    5. Select the Editor Settings option to “Use in rich text editor and the grid.”
    6. Optionally choose the Editor Settings option to “Render in rich text editor and the grid.”
    7. Adjust cache settings as desired.
    8. Switch to the Parameters tab and create parameters for the following:
      1. Image - Media Picker
      2. Caption - Textbox
      3. Width - Integer
      4. Height - Integer
    9. Save.

To use the image in the rich text editor

  1. Edit a page with a rich text editor.
  2. Decide where in rich text to insert an image and click the “Insert Macro” RTE menu option.
  3. Choose the “Inline Image” macro and configure the image.
  4. Save and preview the page and view your image with a caption in all its glory!

For bonus points, add additional features such as the ability to link the image to a URL or overlay text on the image!

Tip

About Umbraco 13

If you are cool enough to be using Umbraco 13, there's an even better way to add these types of tools.  With Umbraco 13, we can now use blocks inside the rich text editor! 

Here's how to create the button from above using a block instead of a macro.

In the Code

  1. Create a partial view called “button.cshtml” in a \Views\Partials\RichText\Components folder (you may need to create some of these subfolders) using the following code snippet:

@inherits Umbraco.Cms.Web.Common.Views.UmbracoViewPage<Umbraco.Cms.Core.Models.Blocks.RichTextBlockItem<Button>>
@using ContentModels = Umbraco.Cms.Web.Common.PublishedModels;
@if (Model.Content.Link != null)
{
	<a class="btn btn-primary" href="@Model.Content.Link.Url" target="@Model.Content.Link.Target">@Model.Content.Link.Name</a>
}

In the Backoffice

  1. Navigate to the Settings section.
  2. Create a new "Element Type" document type named "Button."
  3. Add a group called "Button Properties."
  4. Add a property named "Link."
  5. Create a new editor configuration based on "Multi URL Picker."
  6. Name it "Single URL Picker" and enter a "Maximum number of items" of 1.
  7. Leave all other properties set to the default value and submit.
  8. Add any other properties desired such as alignment, color, etc.
  9. Save.
  10. Locate the Richtext editor in the Data Types and select to edit.
  11. Check the "Block" option in the "Toolbar" section.
  12. Add the newly created "Button" block in the "Available Blocks" section.
  13. Enable the "Blocks Live editing mode" option.
  14. Save.

To use the button in the rich text editor

  1. Edit a page with a rich text editor.
  2. Decide where in rich text to insert a button and click the “Insert Block” RTE menu option.
  3. Choose the “Button” block and configure the button.
  4. Save and preview the page and check out your fancy button!

Using blocks rather than macros, you can take advantage of the full range of property editors available when creating blocks.

With rich text editor stylesheets and macros (or blocks in Umbraco 13!), we have two simple yet powerful tools which can greatly enhance the content editing experience.  So, in the spirit of the season, give your content editors what they really want – easy to use rich text editing tools!