Using the Delivery API to build both a headless and a traditional site.
In this article we’re not going to build a blog with the Delivery API. We’re going to build TWO blogs with the Delivery API, both on top of the same data model.
The first implementation will be a React app that consumes the Delivery API output headlessly.
The second will be a "traditional" Razor implementation. However, it will still leverage the Delivery API, and it will reuse all the custom implementations built for the React app.
Docs all 'round
On the Umbraco documentation portal, you'll find comprehensive documentation for the Delivery API.
If you haven't already, you should probably familiarize yourself with the basic Delivery API concepts before reading this article. It might be a little hard to follow otherwise.
TL;DR - show me the code!
The source code for this article is available on GitHub. The repo even includes the Umbraco database, so you can start playing with it right away.
For the same reason we won't see all the code in this article, but rather dive into the most interesting parts. As the article unfolds, you'll find links to the relevant parts of the repo, so you don't have to clone the repo to follow along.
See the repo README for details on how you get everything up and running.
The data model
Before we get to the fun parts, let's first dive into the data model.
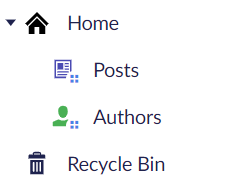
In the content tree we have our blog posts and authors neatly placed under the site root:
The data model
In a purely headless setup, the site root is likely not necessary. But since we're going to build a Razor implementation on top of this, the site root makes for improved routing, and our React app is perfectly able to work with this structure through the Delivery API.
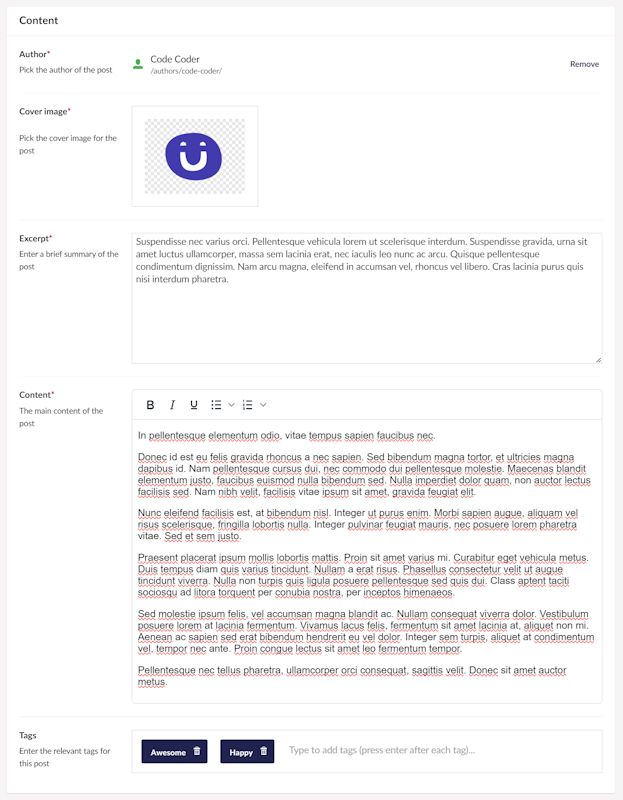
A blog post contains pickers for the post author and cover image, a text area for an excerpt of the post content, an RTE for the actual post content, and an option to add tags to the post:
The blog post model
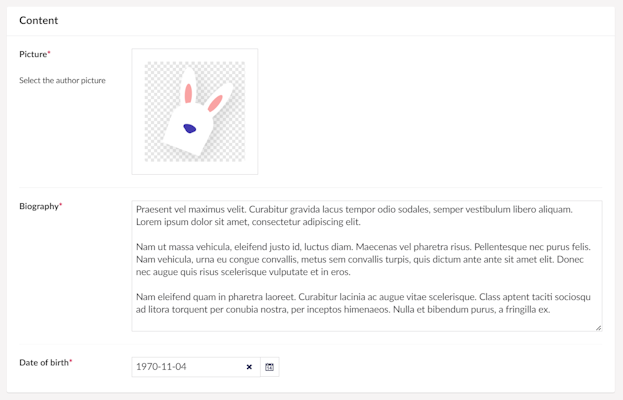
An author in turn has properties for the author picture, a text area for a biography, and a date picker for the author's date of birth:
The author model
CORS (ack, CORS)
Since the React app consumes the Delivery API from a browser, we need to setup CORS policies that allow the consumption. Otherwise, the browser will deny access to the Delivery API for security reasons.
In Program.cs you'll find a CORS policy that allows anyone to perform any operation against the Umbraco server. This is of course way too lenient in a real-life scenario, but it works for the purpose of this article.
Please consider your CORS policies carefully when building applications.
The React blog
Let's get the fun started 😊
The blog is made up of the following pages:
A front page that lists the blog posts.
A blog post details page including a list of related blog posts.
An author details page including a list of blog posts written by the author.
A tags page that lists blog posts by their assigned tags.
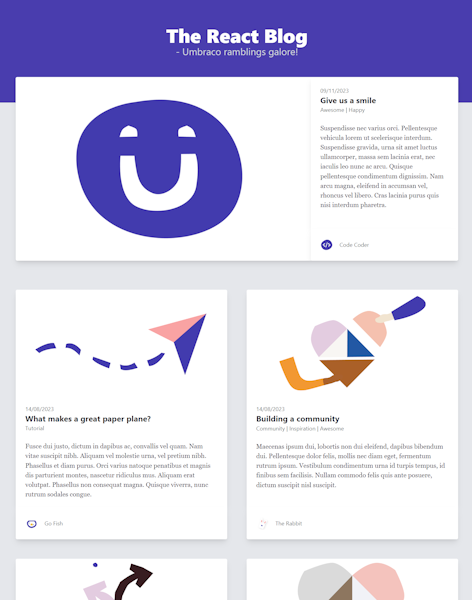
The blog front page
The blog front page
At first glance, the front page might look somewhat straightforward. The Devil, however, always hides in the detail.
To render a single post in this list we need:
The post cover image.
The name and update date of the post.
The post tags.
The post excerpt.
The author name.
The author picture.
All of these are either properties on the blog post data model, or system properties (name and creation date) that are always returned by the Delivery API. Let's look at the default Delivery API output by querying all posts:
GET /umbraco/delivery/api/v2/content/ ?fetch=children:posts &sort=updateDate:desc
Well, that's most of what we need! We still need the author picture, though. To make things accessible, we also need the alt text of both the post cover image and the author picture.
Since its introduction in Umbraco 12, the Delivery API has been able to perform property expansion at the first content level in the response. This feature makes it possible to retrieve data for linked content and media items. Ultimately this helps reduce the number of requests required to obtain the desired content data.
In Umbraco 13, property expansion became possible in a nested fashion, thus no longer limited to content and media items at the first content level.
In other words – to obtain the missing data, we need to:
Expand the author to get the author picture property.
Expand the post cover image and the author picture to get their alt text properties.
GET /umbraco/delivery/api/v2/content/ ?fetch=children:posts &sort=updateDate:desc &expand=properties[coverImage,author[properties[picture]]]
Now we have all the data we need to render the list of blog posts. As a matter of fact, we have way too much data. Each post in the output contains the entire post content, and each author contains the author biography and date of birth.
Another feature in Umbraco 13 is the ability to limit the number of properties returned by the Delivery API. This allows us to shape the response to our specific use case – in this case, a list of blog posts without all the details. Syntax wise, property limiting works just like property expansion.
GET /umbraco/delivery/api/v2/content/ ?fetch=children:posts &sort=updateDate:desc &expand=properties[coverImage,author[properties[picture]]] &fields=properties[excerpt,tags,coverImage,author[properties[picture]]]
Perfect! Now we have exactly the data we need, and we're ready to render the blog front page. You'll find the full implementation of the blog front page here.
For an in-depth explanation of how property expansion and limiting works in the Delivery API, refer to this article.
The blog post details page
The blog details page
To render the details of a blog post, we need to fetch the blog post content item from the Delivery API – including the author details and the image alt texts. We'll apply property expansion and limiting in much the same way as we did for the blog front page, to fetch all blog post data in a single request. Only this time we'll use the "item by path" endpoint instead of the "query multiple items" endpoint:
GET /umbraco/delivery/api/v2/content/item/posts/give-us-a-smile/ ?expand=properties[coverImage,author[properties[picture]]] &fields=properties[$all[properties[picture]]]
Notice how this request features the $all operator. The operator can be applied at any level of the property expansion and/or limiting syntax to target all properties. In this case we use it to return all properties of the blog post content item, while still only returning the author picture property.
Fetching all properties means we are slightly over-fetching, as we really do not need the blog post excerpt here. But this was the only place the $all operator could be fit into this article 😊
We also need the three latest blog posts to render the cards at the bottom of the blog details page. There is no way to obtain those in the request for the blog post details, so we must perform an additional request to the "query multiple items" endpoint.
Even if the current blog post is one of the latest posts, we really don't want it to show up in the cards. There are two ways to go about that:
Fetch the four latest posts to ensure we have at least three posts that are not the current one.
Filter the current post from the result set on the server.
The latter is definitively best in terms of avoiding over-fetching. Alas, the Delivery API does not feature a "any item except this one" filter. But fortunately we can build our own filters, and that is exactly what's been done here with the "isNot" filter:
GET /umbraco/delivery/api/v2/content/ ?fetch=children:posts &filter=isNot:fb3086d5-3a50-4d68-85dc-32c6c786df37 &sort=updateDate:desc &take=3 &expand=properties[coverImage] &fields=properties[excerpt,tags,coverImage]
More about custom filters in the next section. The implementation of the blog post details page is found here.
The author details page
The author details page
The author details page is largely implemented in the same way we did the blog details page; first we fetch the requested author content item, then we fetch the posts written by the author.
Of course, the Delivery API has no concept of our data model out of the box. Nor does it allow for querying any content property for any value. This means that we need to lean against the query extension API for the Delivery API.
Before we dive into the details, it's important to understand one thing: All querying against the Delivery API is powered by a search index. The underlying technology is Examine at the time of writing, but we need not concern ourselves with that; the extension API is created technology agnostic, in the hopes that one day we'll be able to choose between a range of different providers.
Since we can already query the Delivery API for all posts, what we require to build our list of author posts is a means to filter those posts based on their author. Remember – the Delivery API knows nothing about our data model, so we need to:
Enrich the search index with the author ID for each post.
Create a filtering mechanism that queries the search index for said author ID.
In the extension API these are implementations of IContentIndexHandler and IFilterHandler, respectively.
The IContentIndexHandler is responsible for:
Defining the fields it will potentially add to the search index. Usually it will only add a single field, but if need be, any number of fields can be added.
Extracting the applicable index fields for a content item. Again there can be multiple, or none at all, depending on the scenario we're implementing for. An index field can contain multiple values, which in this case would be relevant if a blog post could have several authors.
The IFilterHandler in turn is responsible for:
Figuring out if it can handle any given "filter" query (from the request query string).
Actually handling the "filter" query.
The Delivery API will not populate new search index fields automatically. Before we can query our filter, we must first rebuild the DeliveryApiContentIndex from the "Examine Management" dashboard under "Settings".
With the author indexing and filter in place, we can perform a filtered query against the Delivery API:
GET /umbraco/delivery/api/v2/content/ ?fetch=children:posts &filter=author:39f78eaa-754d-4053-916f-e94db094f604 &sort=updateDate:desc &expand=properties[coverImage] &fields=properties[excerpt,tags,coverImage]
You'll find the author details page implementation here and the author indexer/filter implementation here.
The tags page
The tags page
This page employs the same techniques as the other pages:
A custom indexer and filter to search for posts by tags.
Property expansion and limiting to shape the Delivery API output specifically for the page rendering.
The most interesting thing to highlight here is that a blog post can have multiple tags. As such, the custom indexer potentially stores multiple tags per post in the index field. When the Delivery API queries an index field with multiple values, it performs a logical OR. In this case, it means that if the tag being used for filtering is among the tags on the blog post, the post will be part of the result – which is exactly what we want here.
The tags page implementation is found here, and the tags indexer/filter implementation here.
The Razor Blog
So… we've built a blog with React, serving our data model headlessly from Umbraco. Now it's time to build the same blog all over again, only this time with Razor, using Umbraco as head of the request.
This means that we no longer need to query the Delivery API to get the content data. Content is readily at hand when we need it. Or… is it?
Content is most certainly loaded into memory, which means it's easy to access. But that doesn't necessarily mean that it's the most performant way to go. On large datasets, an in-memory content query can become a rather costly affair to perform.
In other words, as our blog grows with more posts over time, content queries for post lists (i.e., the latest posts on the front page) will perform worse. Luckily, we've just built all the querying we need to serve posts to the React Blog. And since this query is offloaded to a search index, the performance will not degrade significantly as the volume increases.
To utilize the Delivery API querying in our own code, we need to inject the IApiContentQueryService. With this in hand, we can perform queries in a syntax that much resembles what we use against the API itself:
	var result = _apiContentQueryService.ExecuteQuery(
		fetch: "children:posts",
		filters: Array.Empty<string>(),
		sorts: new[] { "updateDate:desc" },
		ProtectedAccess.None,
		skip: 0,
		take: 10);
Querying the Delivery API from code
The query service produces a paginated result-set of content keys. With IPublishedSnapshotAccessor we can get access to the in-memory content cache and turn these content keys into IPublishedContent:
	var publishedContentCache = _publishedSnapshotAccessor.GetRequiredPublishedSnapshot().Content
								?? throw new InvalidOperationException("Could not obtain the published content cache");

	var contentItems = result.Result.Items.Select(publishedContentCache.GetById).WhereNotNull().ToArray();
Get content from query result
This technique is applied through-out the Razor Blog:
The HomeController uses it to find the list of blog posts for the blog front page.
The AuthorController uses it to find all blog posts written by the current author.
The TagsController uses it to find all blog posts with a given tag.
Performance aside, this approach means we don't have to reinvent our query implementation; we can re-use the code we've already written to power the React Blog. This in turn helps ensure that we deliver consistent end user experiences across all channels that consume our data model. And that's pretty cool!
"...we don’t build headless stuff. The Delivery API is not for me."
While the Delivery API is certainly built with headless in mind, there is no reason why you can't use it for Razor based sites too. If you build custom APIs for asynchronous retrieval of content, chances are the Delivery API can be used instead of these custom APIs.
To demonstrate this, the blog details page renders a list of "recommended blog posts". If you look closely, it's just rendering a random list of blog posts. The interesting part is that it does so asynchronously with the Delivery API.
In this thought-up scenario, we have an external recommendation service feeding us content IDs of recommended blog posts (the recommendation service data is in this case just a random collection of IDs generated at the top of the Razor template, but you get the idea). A web component then grabs the recommended content IDs and uses the "get multiple items" Delivery API endpoint to procure data for a list of cards that present the recommended blog posts to the end user.
Closing remarks
Well. That was a mouthful! If you've stuck with me 'till the end, I thank you 😊
I'm fully aware that the Delivery API is not for everyone. It is however a quite capable feature, and there might just be more use-cases for it than what initially meets the eye - also in a non-headless setting.
I hope this article has sparked some ideas with you, and that you'll give the Delivery API a spin if you haven't already.