Windows Terminal

Windows Terminal out of the box is GREAT, but how can we make it even greater?

As a Windows lover I never thought I'd be a terminal person, but it's 2022 and here we are: there's so much we can do more efficiently on the terminal, especially in the dotnet & npm world we Umbraco developers find us in these days.

I used to have an app called cmder installed to make it look a little bit more attractive, when your terminal looks better you can read it easier and work quicker. 

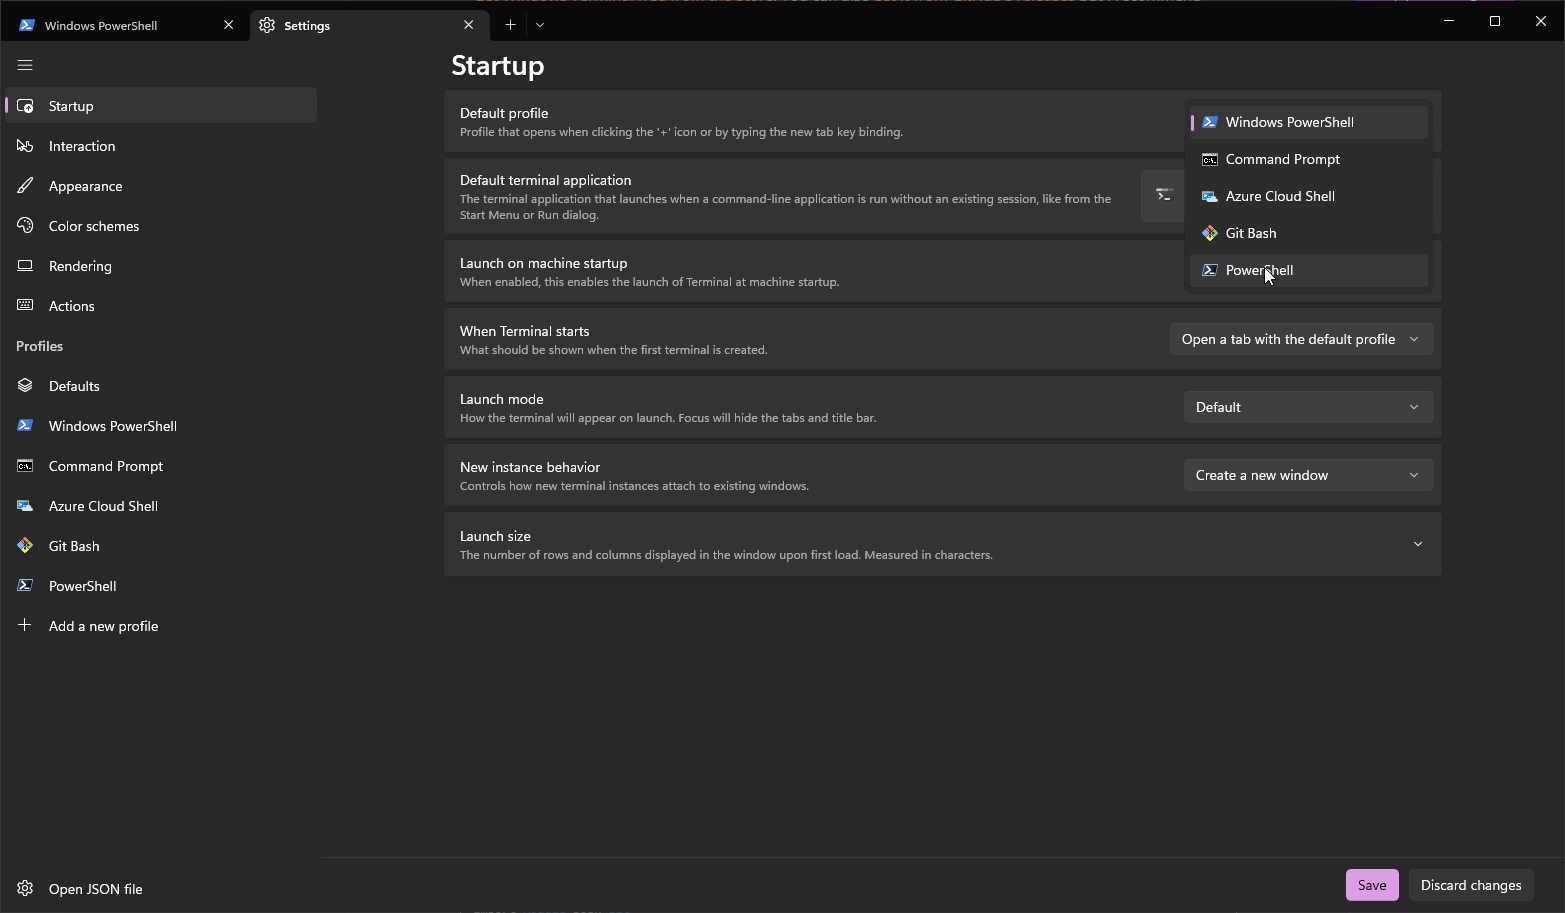
In the last few years Windows Terminal has not just become a beautiful and native alternative, but it's slowly rolling out now as the default terminal for Windows 11.

For this post I am leaning heavily on Scott Hanselman's Windows Terminal series, and honestly, I was just going to point you there for today's tip. However, things move fast, and those instructions need updating, so here we go!

For this guide I'm assuming you're on Windows 11 and are keeping yourself updated regularly. Windows 10 and older versions of Win11 might need some more work. Additionally, you will need to have Git for Windows installed (and please make sure to update to the latest version, not for this guide but for security purposes).

A short summary of what's coming up:

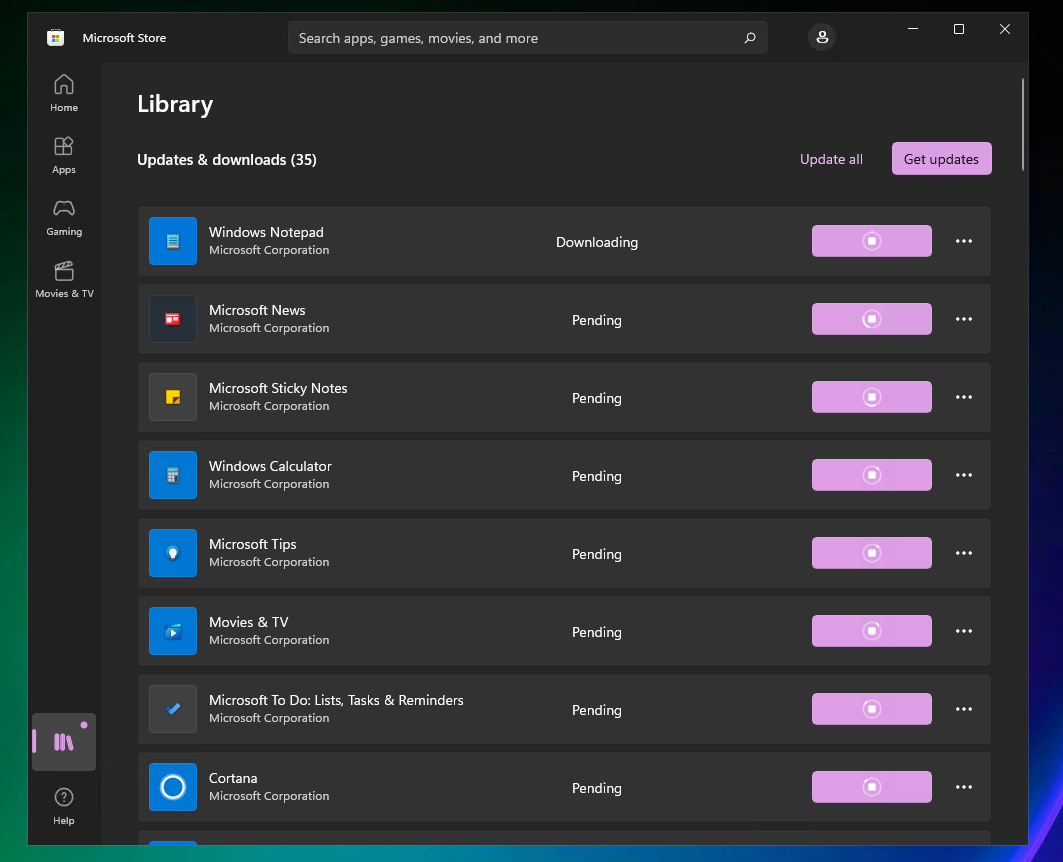
  • Install or update Powershell 7
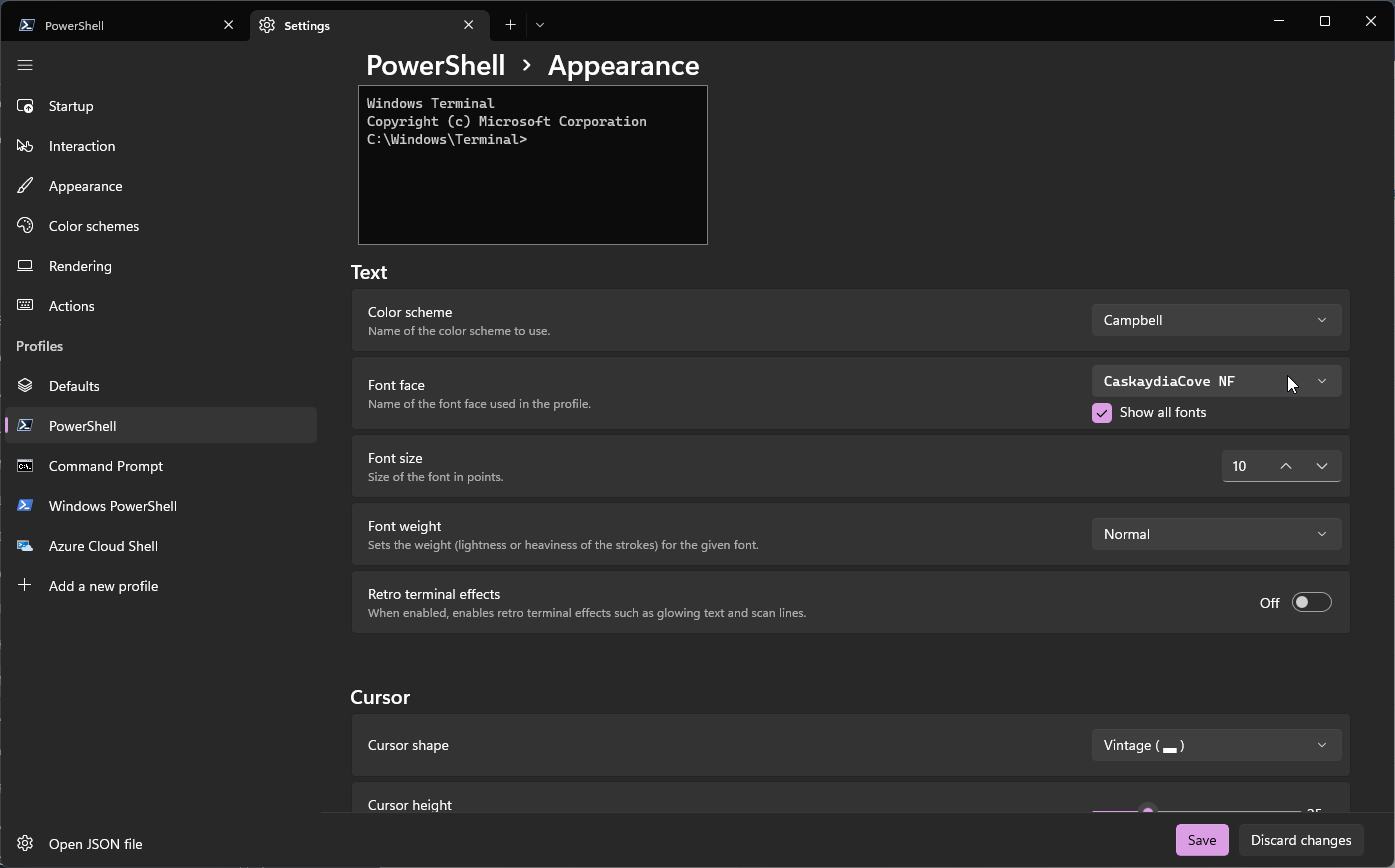
  • Get good font to help make things look great
  • Install plugins:
    • Posh Git
    • Oh-my-posh
    • PSReadline
    • Terminal Icons
  • Load plugins by default and tweak the settings
  • Add some helpful keyboard shortcuts

Powershell 7

If you don't yet have powershell 7 (also known as Powershell Core) installed then it's a quick install using winget on the command line:

winget install --id Microsoft.Powershell --source winget

Alternatively download it form the Microsoft Store (search for Powershell 7). Do yourself a favor and don't download it from Microsoft, it will make upgrading a pain! If it's installed through winget / the store then auto-updating can happen.

After installing / updating Powershell (the version at the time of writing is 7.3.0) you can set the default profile in Windows Terminal to this version of Powershell, it has a darker color than the "old" windows powershell. 

Screenshot of the Windows Terminal settings window showing a dropdown for the default profile

Note: if you open the Terminal settings and it opens the settings JSON file then you need to update Windows Terminal, you can do so in the Microsoft Store. 

I'll highly recommend that you tap "Update All" here, and that you tap your profile icon, go to "App Settings" and enable "App updates" so that apps update automatically from now on.

Screenshot of Microsoft Store after tapping "Update all" showing all installed apps being updated

If you had to install some updates, scroll up a little and make sure Powershell 7 is now the default profile.

Nerd fonts

I highly recommend downloading the Caskaydia Cove Nerd font. It has all the icons we will need later to make everything look great. I haven't tried any of the other fonts, but feel free to play around, I just don't know which ones has the required icons.

After downloading this font unzip it and find the file named:

Caskaydia Cove Nerd Font Complete Windows Compatible Regular.otf

Double-clicking that file will give you an install button so we can use that font later on.

Powershell plugins

Next we'll install the following plugins:

  • Posh-git
    • Shows useful information in the terminal when we're in a directory that is a git repository
  • Oh-my-posh
    • Will make our terminal look pretty, with useful coloring and layout options
  • Terminal-Icons
    • It's in the name, provides useful icons all throughout the terminal
  •  PSReadline
    • Gives us useful auto-complete options

To install Posh-git use the following command:

Install-Module posh-git -Scope CurrentUser

Oh-my-posh has a new way to install it which differs from Hanselman's blog post above, this is the new way:

winget install JanDeDobbeleer.OhMyPosh -s winget

With that installed you can add Terminal Icons:

Install-Module -Name Terminal-Icons -Repository PSGallery

Finally, PSReadline has a bit more complicated, make sure to close all terminal windows as it might find some files in use if you don't.

Then open your Windows Start menu and type: cmd

From there you can right-click on "Command Prompt" and choose "Run as administrator".

Start menu with "Command Prompt" right-clicked and "Run as administrator" selected

At this command prompt we can install PSReadline like so:

powershell -noprofile -command "Install-Module PSReadLine -Force -SkipPublisherCheck"

Loading plugins and settings

We're ready to do some configuring now, open Windows Terminal again (remember it should start Powershell 7 at this point) and type:

notepad $PROFILE

This opens a new notepad which will ask you if you want to create a file (if it doesn't yet exist). Add the following to the file at the bottom (or at the top if it's a new file):

oh-my-posh init pwsh --config ~/.custom.omp.json | Invoke-Expression
Import-Module posh-git
Import-Module -Name Terminal-Icons
Set-PSReadLineOption -PredictionSource History
Set-PSReadLineOption -PredictionViewStyle ListView
Set-PSReadLineOption -EditMode Windows

After saving that file you will have noticed that we linked to a custom.omp.json file, this is used to make our Terminal look awesome! This file is a bit too long to list here, but you can copy it from this gist to get started.

You need to save this file in your C:\Users\{your-username} directory (in my case: C:\Users\Sebastiaan).

We're almost there! Finally, a default font needs to be set. You can to this from your Terminal Settings > Powershell 7 > Appearance > Font Face. Make sure to check on Show all fonts and choose CaskaydiaCove NF from the list.

Font settings for Powershell in Terminal with CaskaydiaCove NF selected

When this is done, make sure to close Windows Terminal and reopen it. You should now have it looking a little something like the video below:

A gif of what Terminal should look like now, with icons and autocompletion and history

Additional keyboard shortcuts

One bonus feature we now have access to is that we can listen to keyboard shortcuts. I've added CTRL+SHIFT+B and CTRL+F5 to start a dotnet build and dotnet run respectively. Edit the Powershell config again:

notepad $PROFILE

Then add the following to the bottom:


Set-PSReadLineKeyHandler -Key Ctrl+Shift+b `
                         -BriefDescription BuildCurrentDirectory `
                         -LongDescription "Build the current directory" `
                         -ScriptBlock {
    [Microsoft.PowerShell.PSConsoleReadLine]::RevertLine()
    [Microsoft.PowerShell.PSConsoleReadLine]::Insert("dotnet build")
    [Microsoft.PowerShell.PSConsoleReadLine]::AcceptLine()
}

Set-PSReadLineKeyHandler -Key Ctrl+F5 `
                         -BriefDescription BuildCurrentDirectory `
                         -LongDescription "Run the current directory" `
                         -ScriptBlock {
    [Microsoft.PowerShell.PSConsoleReadLine]::RevertLine()
    [Microsoft.PowerShell.PSConsoleReadLine]::Insert("dotnet run")
    [Microsoft.PowerShell.PSConsoleReadLine]::AcceptLine()
}

There is so much more you can do with the Terminal but I've (so far) stopped here. Loading those plugins takes a bit of time each time you start the Terminal so be careful not to overdo it either.