Astro-nomically Performant Websites using the Content Delivery API
posted onby
Louie Richardson
tagged with
API
Headless
v12
v13
Let's have a look at Astro, a modern JavaScript static site generator, and how we can combine this with Umbraco's new Content Delivery API.
Umbraco 12 released the Content Delivery API, allowing developers to easily retrieve content in JSON format using their REST API. Recently I've enjoyed developing sites with Astro, a front-end framework used for static site generation which is super performant due to loading zero client-side JavaScript by default. So why not combine the two to build a performant website with a great developer experience?
What is Astro?
Firstly, what is Astro? Well, the documentation says: "Astro is an all-in-one web framework for building fast, content-focused websites". Astro is a multi-page application framework that uses static site generation. This take all the heavy lifting away from the client and moves it onto the server.
Why use Astro?
Flexibility: Astro allows you to bring your favourite framework such as React or Vue into the same codebase. Can't decide whether to use React or Svelte for a project, why not just use both? This can be done easily via Astro Integrations which brings me onto my second point.
Extensibility: Astro Integrations provide a way of adding functionality to your project with a few lines of code. Want to add Tailwind CSS to your project but don't feel like going through the whole installation process? You can run npx astro add tailwind in your terminal and get Astro to do it all for you. Oh, and did I mention you can write your own integrations? 🤯
Performance: It's blazingly fast. Astro's secret sauce for being so performant is due to their island architecture. You can think of an island being an interactive UI component that has been hydrated with JavaScript in a sea of static HTML. You can control when this component has its JavaScript loaded with special client directives such as client:visible, which as you can guess will load the JavaScript once the component comes into the viewport. You can imagine this being very effective for when you want to load something bulky like an image carousel library into your project, but don't want to load any of the related JavaScript until it's actually visible on the end-user's browser.
That's enough of me rambling on about how great Astro is, let's get into how we can harness the power of the Content Delivery API.
Content Delivery API
The Content Delivery API has a OpenAPI Specification (OAS) which makes it possible to view our API endpoints in an easy-to-use interface. The Delivery API makes going headless a whole lot easier since we have pre-defined API endpoints we can fetch data from without having to go off and build our own .NET endpoints.
To use the Content Delivery API we will need to set Enabled to be true inside the DeliveryAPI properties in our appsettings.json.
There are a few query parameters we can pass in, such as expand, fetch, filter and sort.
Endpoint Security
All content is made public by default in the Delivery API. We can use an API key in our appsettings.json file if we want to restrict content. Member Authorisation has also been added in Umbraco 13!
We don't want to be writing out the entire URL like the one above every time we want to fetch our data, especially when we start adding in query parameters. We should make this easier for ourselves and write a client that can generate the URL and create a fetch request using custom helper methods.
Building the Client
We can build a client in TypeScript that we can import into any page or component on our site. This client will help abstract away the need to manually write URL's to fetch specific data from for our Astro pages and components.
Install Astro
First let's get an Astro site running locally. Run npm create astro@latest in your terminal to initialise the Astro CLI to scaffold out our Astro site. I personally like using the empty starter kit since it's minimal.
After going through the CLI setup, run npm run dev to get our local host running. You should see something like this:
Congratulations, you've now got a working Astro site up and running! 🥳
Page / Component Structure
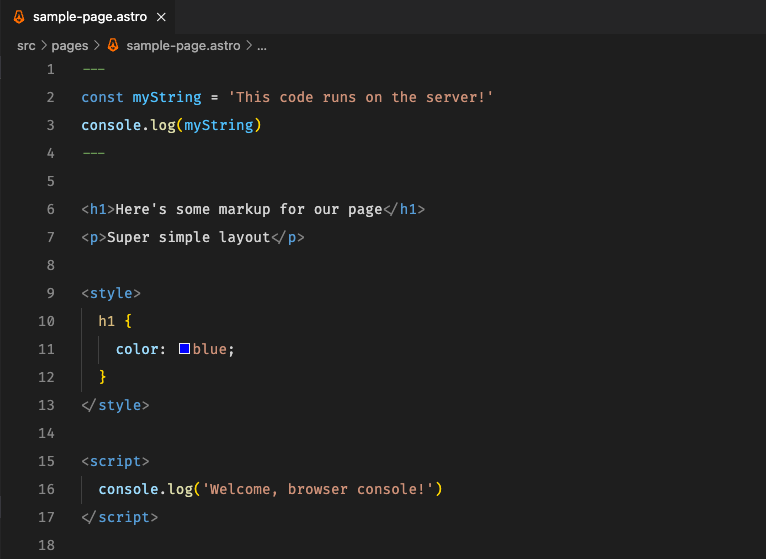
Astro uses single file components much like Vue and Svelte. Below is what an Astro page or component might look like:
Structure of an Astro page or component
At the top of the file in between the hyphens is the JavaScript code that will run on the server at build time. Followed by our template, style tags and script tag that will load JavaScript on the client at runtime.
TypeScript Umbraco Client
We are going to use TypeScript for our Umbraco client, and since Astro comes baked-in with TypeScript by default, there is no setup required! Let's create a file for our Umbraco client, this can be created inside the src directory (src/umbraco-client.ts).
We create a class named UmbracoClient with two methods (getContentById, getContentByType).
We are expecting a domain name to be passed into our class which is used inside the constructor to build the URL for the Delivery API. When we export our client at the bottom of the file, we are passing in the domain name of our site.
At the moment we only have support for fetching content based on item type or ID, let's add a couple utility functions so we can pass in query parameters to our fetch request URL. Inside src create a file called utils.ts which will contain our utility functions.
export type Sort = {
  type: 'createDate' | 'updateDate' | 'sortOrder' | 'name' | 'level'
  order?: 'asc' | 'desc'
}

function getSortParam(sort: Sort): string {
  if (!sort) return ''

  return `&sort=${sort.type}:${sort.order}`
}

export type Expand = 'all' | string[]

function getExpandParam(expand: Expand) {
  let expandParam = ''

  if (expand === 'all') {
    expandParam = '&expand=all'
  } else if (typeof expand === 'object') {
    expandParam = '?expand=property:'

    expand.forEach((item, index) => {
      expandParam += index === 0 ? item : `,${item}`
    })
  }

  return expandParam
}

export { getSortParam, getExpandParam }
src/utils.ts
The utils.ts file will include two helper functions that will help pass in our sort and expand parameter.
Now let's modify the umbraco-client.ts file to introduce our new helper functions so we can have a couple query parameters to sort and expand our data.
Our Umbraco client is now ready to be imported into any of our pages or components! 🚀
Maybe now is a good time to include a shameless plug and let you know that I'm currently building an Umbraco client package.
Building our Astro Pages and Components
To follow along with this you will need to get an Umbraco project up and running, using the documentation if needed.
Create two document types:
Homepage including 2 fields (title, description)
Blog Post including 3 fields (title, description, image)
Back in our Astro project inside the src directory create a layouts directory, this will be where we store our Layout.astro so we can have a consistent layout across pages, that includes our site metadata tags along with any styling.
At the top of the file we are destructuring the properties that will be passed into our layout component. This means we can use the title and description in our metadata.
In our <body> we are using the <slot /> tag to populate the page with all the content wrapped inside the <Layout> component.
Now we can import this into any of our new pages we create. Navigate to the src/pages and you will find we already have an index.astro, let's swap out the existing code we have in there:
This may look overwhelming at first but don't worry, let me take you through it.
First we are importing our Layout and client.
Next we use the client to take advantage of our getContentById method. We pass in "homepage" as the id and we destructure the result which includes our title and description. You'll notice we are using await without having to wrap any of this in an asynchronous function, that's because Astro has top-level await by default which allows for cleaner fetch requests.
We also want to display a grid of blog cards on our page so we use the client to fetch all blogPost's from Umbraco using client.getContentByType('blogPost') and sort the data by creation data in ascending order.
Since we want to display an image on each of the cards we create a little function that will return the full image URL.
Then we wrap all of our page content inside the Layout component and pass in our page title and description. We map over the blogPosts that is returned from the client and render a card for each which is then styled using scoped styling.
Let's create a blog post page so we can click on our blog post cards and navigate to the right blog post. Inside src/pages create a directory called blog then inside of that create a file called [slug].astro. The full path should look like this src/pages/blog/[slug].astro.
This is the code we are going to include in this file:
At the top of the file we are doing the same thing as on the homepage (importing the client and Layout).
Next we use the getStaticPaths function which will generate a page for each of our blog posts. Since we called the page [slug].astro, the getStaticPaths function will get a list of our blog posts using the client method getContentByType('blogPost') then do a loop over each of the results and swap out the [slug] for the page route.
We then set the props to be page.properties which will pass in our properties to the page using Astro.props, these can then be used inside our template.
In the end you will be left with an Astro site that leverages the power of the new Content Delivery API. This is just the beginning, there is so much more you can do with Astro and Umbraco but I will leave that in your hands as this is just a simple demonstration to spark some inspiration!
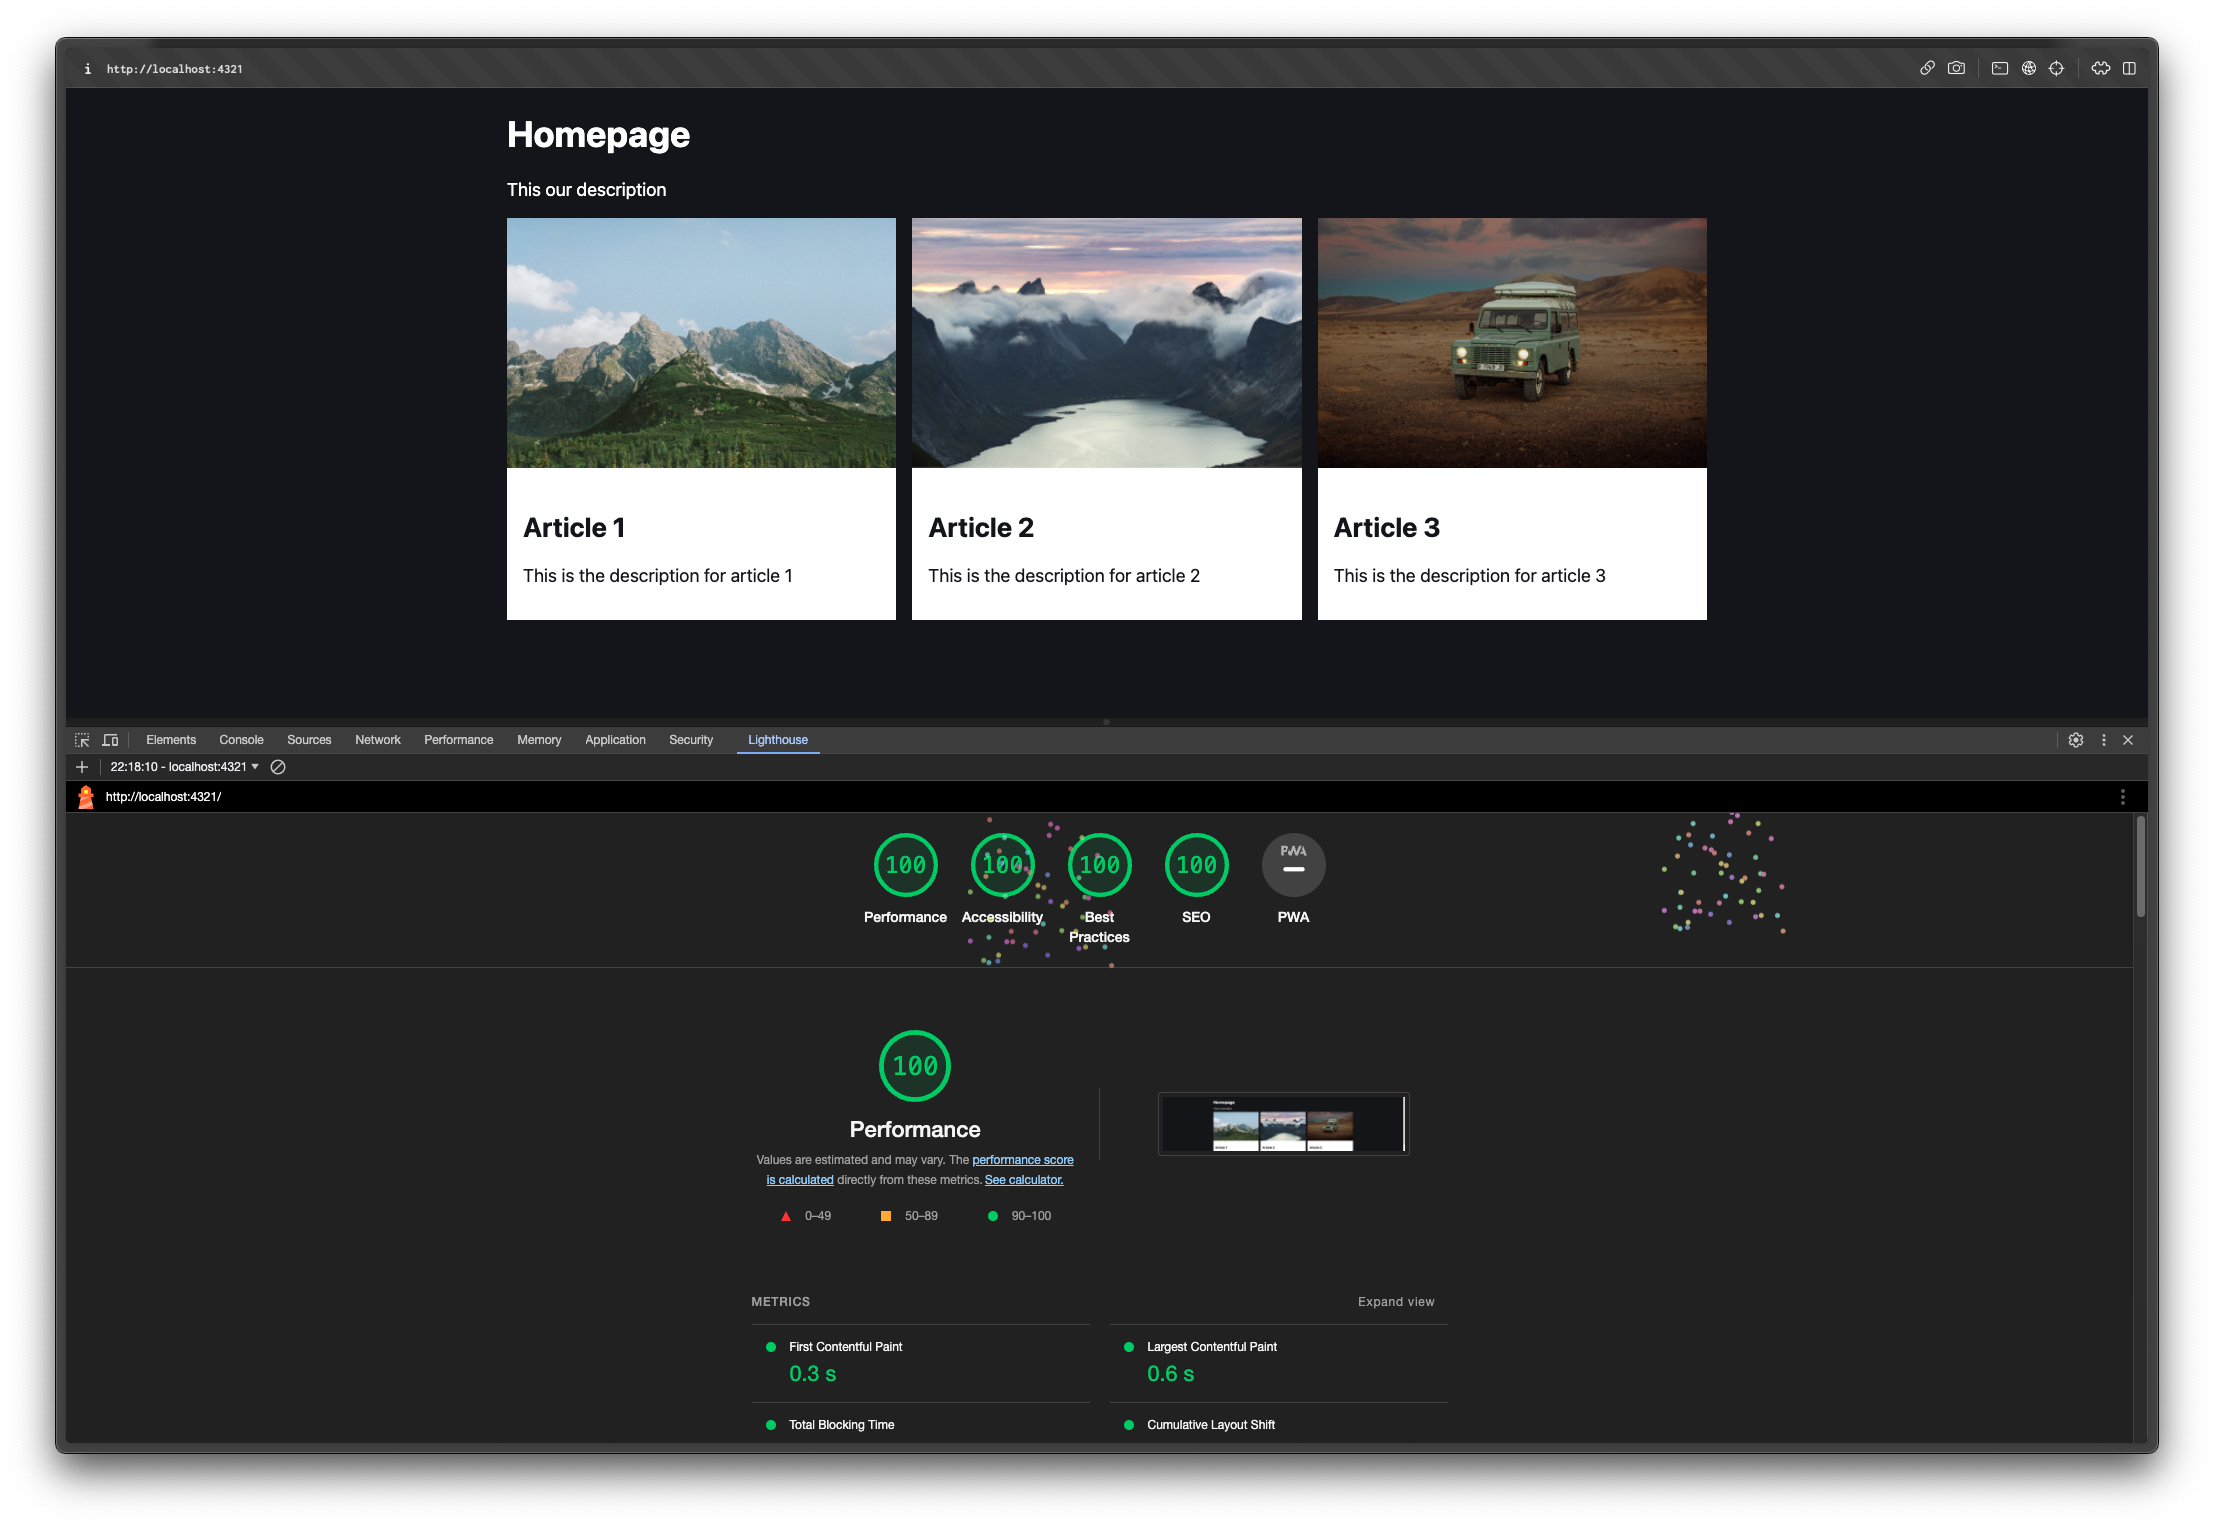
Google Lighthouse Results
Now I've mentioned Astro being very performant, like Astro-nomically performant, so let's see some Google Lighthouse results to bring this to a close.
Now isn't that just beautiful! 😍
What About Server-Side Rendering?
"What about when I can't pre-render pages ahead of time such as pages that required authentication?"
Since Astro is a static site generator it won't have SSR by default. This may sound like a pain to configure but it's actually very simple.
Inside the astro.config.mjs file there is a defineConfig function where you pass in all of your Astro configuration settings.
import { defineConfig } from 'astro/config'
import { nodejs } from '@astrojs/node'

// https://astro.build/config
export default defineConfig({
  output: 'server', // 'server' or 'hybrid'
  adapter: nodejs()
})
astro.config.mjs
Inside the settings object we set the output value to be server and import our adapter, in this case it's Node JS. The output value could also be hybrid which still turns the entire site to SSR but you can tell specific pages to use static site generation by adding export const prerender = true at the top of the Astro file in between the hyphens (the JavaScript code that runs on the server at build time).
Webhooks are coming!
Umbraco 13 is introducing webhooks! This is a great feature to have baked into any CMS that is serious about headless sites. Using webhooks we can tell our hosting provider to re-build the site when content changes are made. In this example the webhook will send a request to Cloudflare telling them to re-build the site so our new content changes are live.
Deployment
Deploying a static site is fast, easy and cheap, especially with services like Cloudflare Pages which allows us to deploy using edge computing bringing the deployed site closer to our end users. This in turn will bring our hosting costs down as well as reducing latency significantly.
Here's a fun fact: The Cloudflare network can reach 95% of the global population within 50 milliseconds! 🚀
Conclusion
I hope this article has sparked some inspiration to what is possible with new Content Delivery API, and maybe you've even considered making the switch to something like Astro? 😏