How to build and release an Umbraco starter kit as a .NET Project Template

tagged with .NET Core Backend Backoffice Content Frontend Git GitHub Package PropertyEditor v10

This article covers how to create a custom dotnet project template from an existing Umbraco Starter kit (including example content) using uSync and CI/CD via GitHub actions, and then sharing it on Nuget and Umbraco Marketplace

Introduction

By Dean Leigh

For many years I watched numerous people asking in chat groups and forums if there are any ready made templates for Umbraco to use for rapid application development, preferably using Bootstrap.

Of course Paul Seal had already created the very useful Clean Starter Kit but this was:

  1. a ready made template rather than using Bootstrap Components individually
  2. a nuget package added to an existing Umbraco installation

As predominantly a front end developer I felt this was an opportunity for me to contribute to the Umbraco community. However, at the time I was not particularly enthused as Bootstrap did not support a lot of modern CSS including CSS Grid.

However, with version 5.1 that all changed and with perfect timing Bootstrap CSS Grid support was added just as Umbraco Grid was released and in my opinion they were made for each other.

Razor Pages Dotnet project template

To test my theory I set about creating a site called:

Bootstrap 5 Components in C# Razor Pages

This meant I could brush up on my C# and Razor Pages skills and learn the latest Bootstrap at the same time.

I wanted to spin up a .Net site very quickly to test Bootstrap CSS Grid. Whilst most .Net example sites used Bootstrap it was often older versions and did not include Bootstrap CSS Grid.

So I decided to use the Razor Pages dotnet new project template included in the Microsoft SDK and upgrade Bootstrap afterwards.

I was really impressed with the simplicity of creating a site that used Razor Pages with examples and content already included. I have always felt that reverse engineering is a great way to learn.

In short, I realised dotnet new project templates are a great starting point for learning and testing as even as a starter kit.

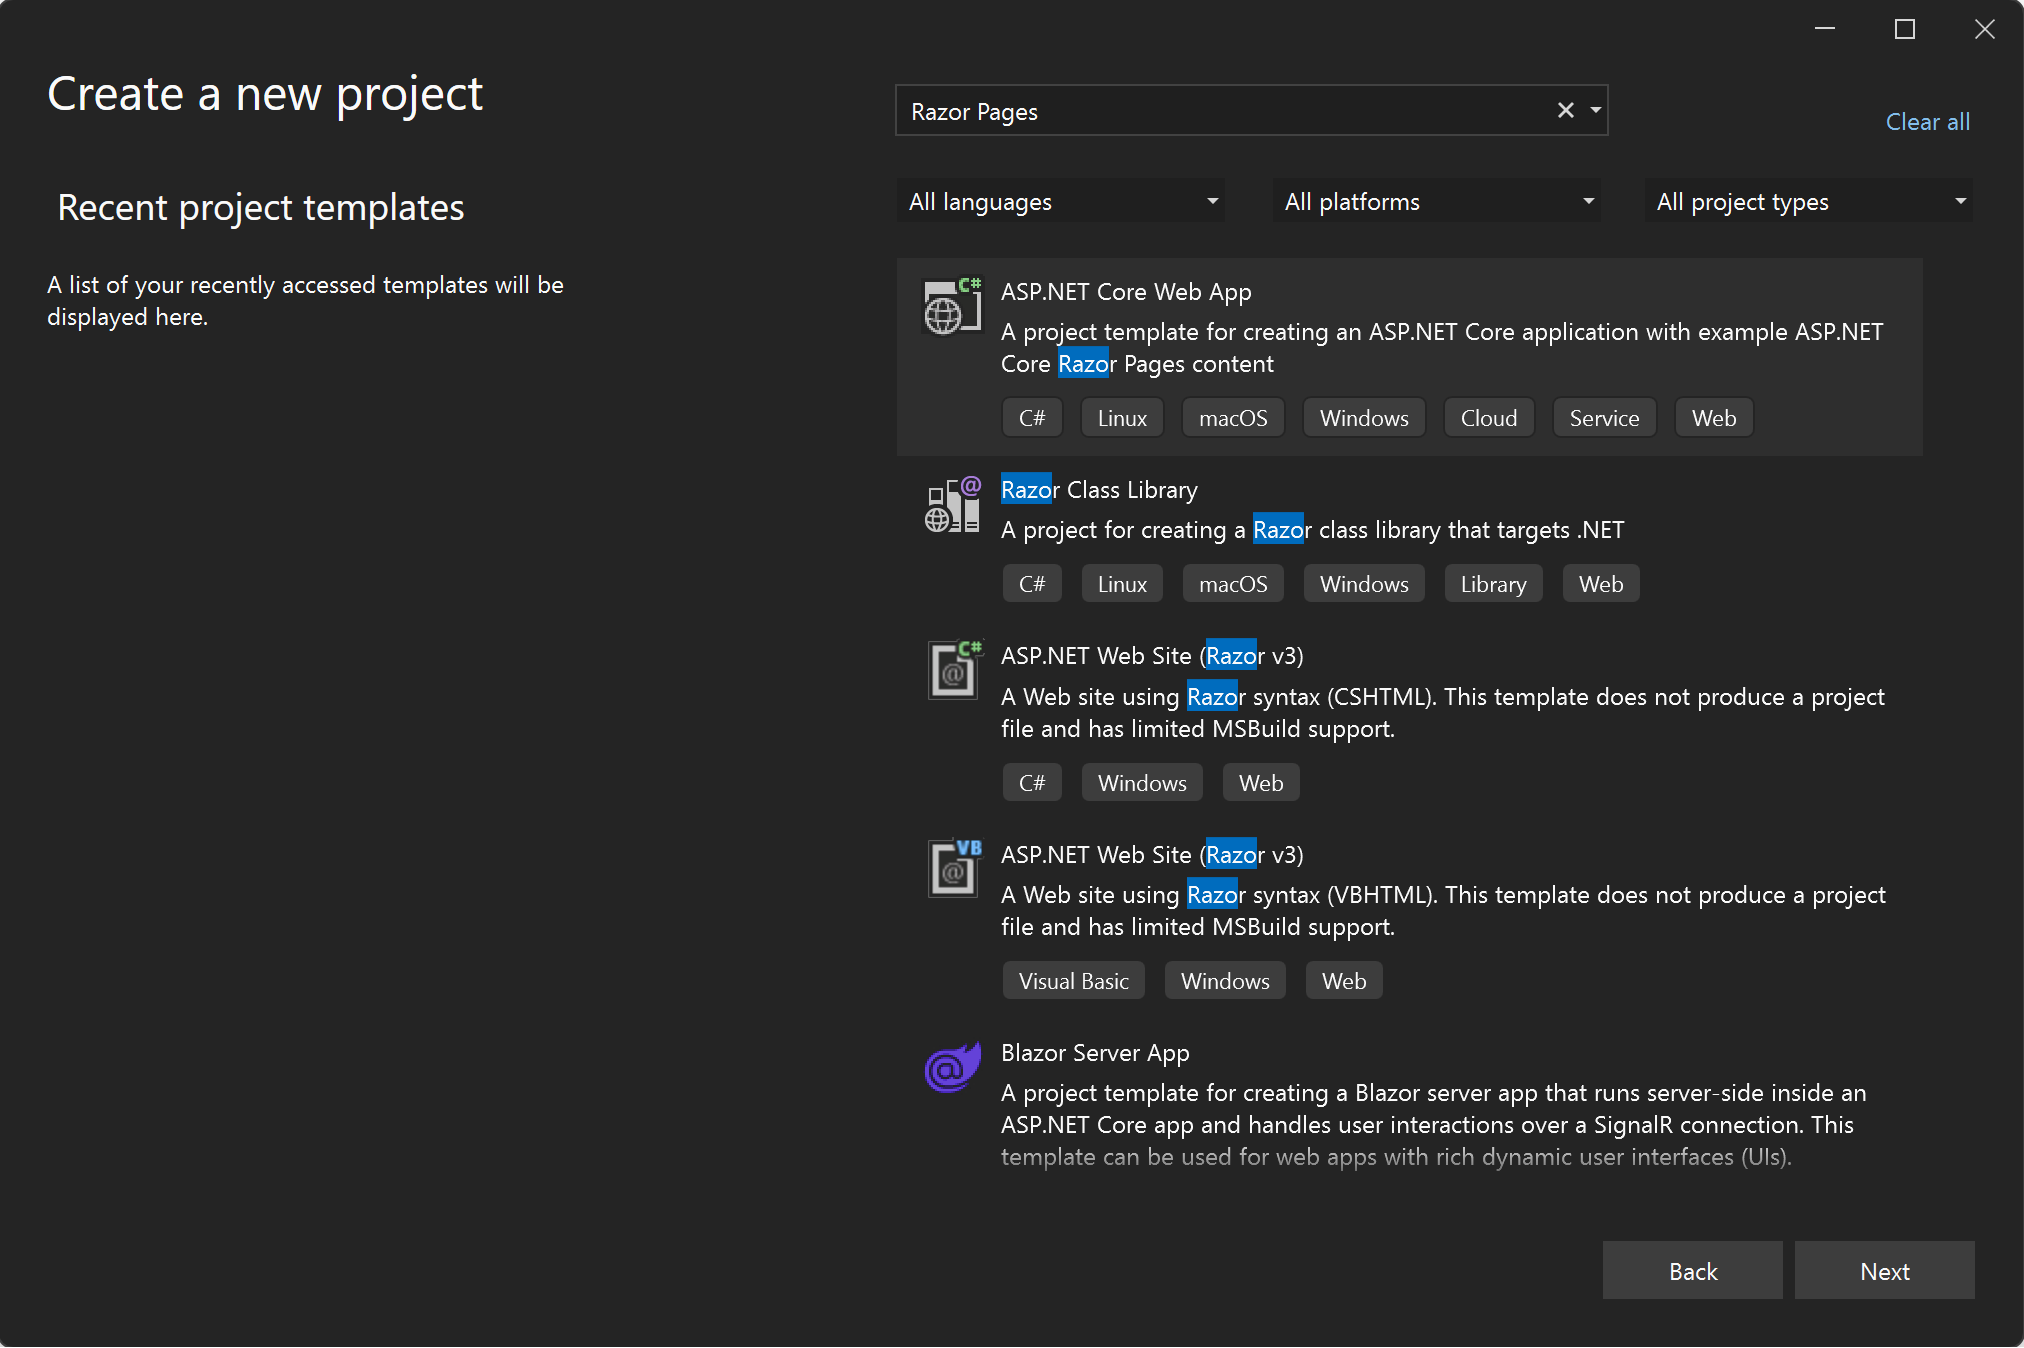
Visual Studio showing Project Templates

Visual Studio Dotnet New Project Templates

Of course you could use the CLI

dotnet new webapp,razor -n MyRazorApp

GitHub Actions

Once I had the site up and running locally I was able to make my site live on commit, all from within Visual Studio using GitHub Actions ready made CI/CD Yaml that will build and deploy a .NET application to an Azure Web App.

I have been using Microsoft’s off the shelf CI/CD for some time with Azure DevOps and found this was equally as easy and the Yaml file it creates is fairly readable if you wish to customise it.

UmBootstrap

I had some help with some of the Razor Pages examples from Aaron Sadler who asked:

“Why didn't I make it in Umbraco?”

I explained it was very quick to make using the Razor Pages Project Template rather than setting up a whole Umbraco site and adding content (I was not aware of using Usync on first boot to add the example content at the time).

And that's when the benefits of using dotnet new for a Starter Kit, over adding a Nuget Package into an Umbraco site, became apparent.

But first we had to create the Starter Kit itself. We wanted something self-documenting, with working examples of common features and functionality where users could use components in their own projects.

Aaron though it would be a great community project and offered to help get it up and running and so UmBootstrap was born.

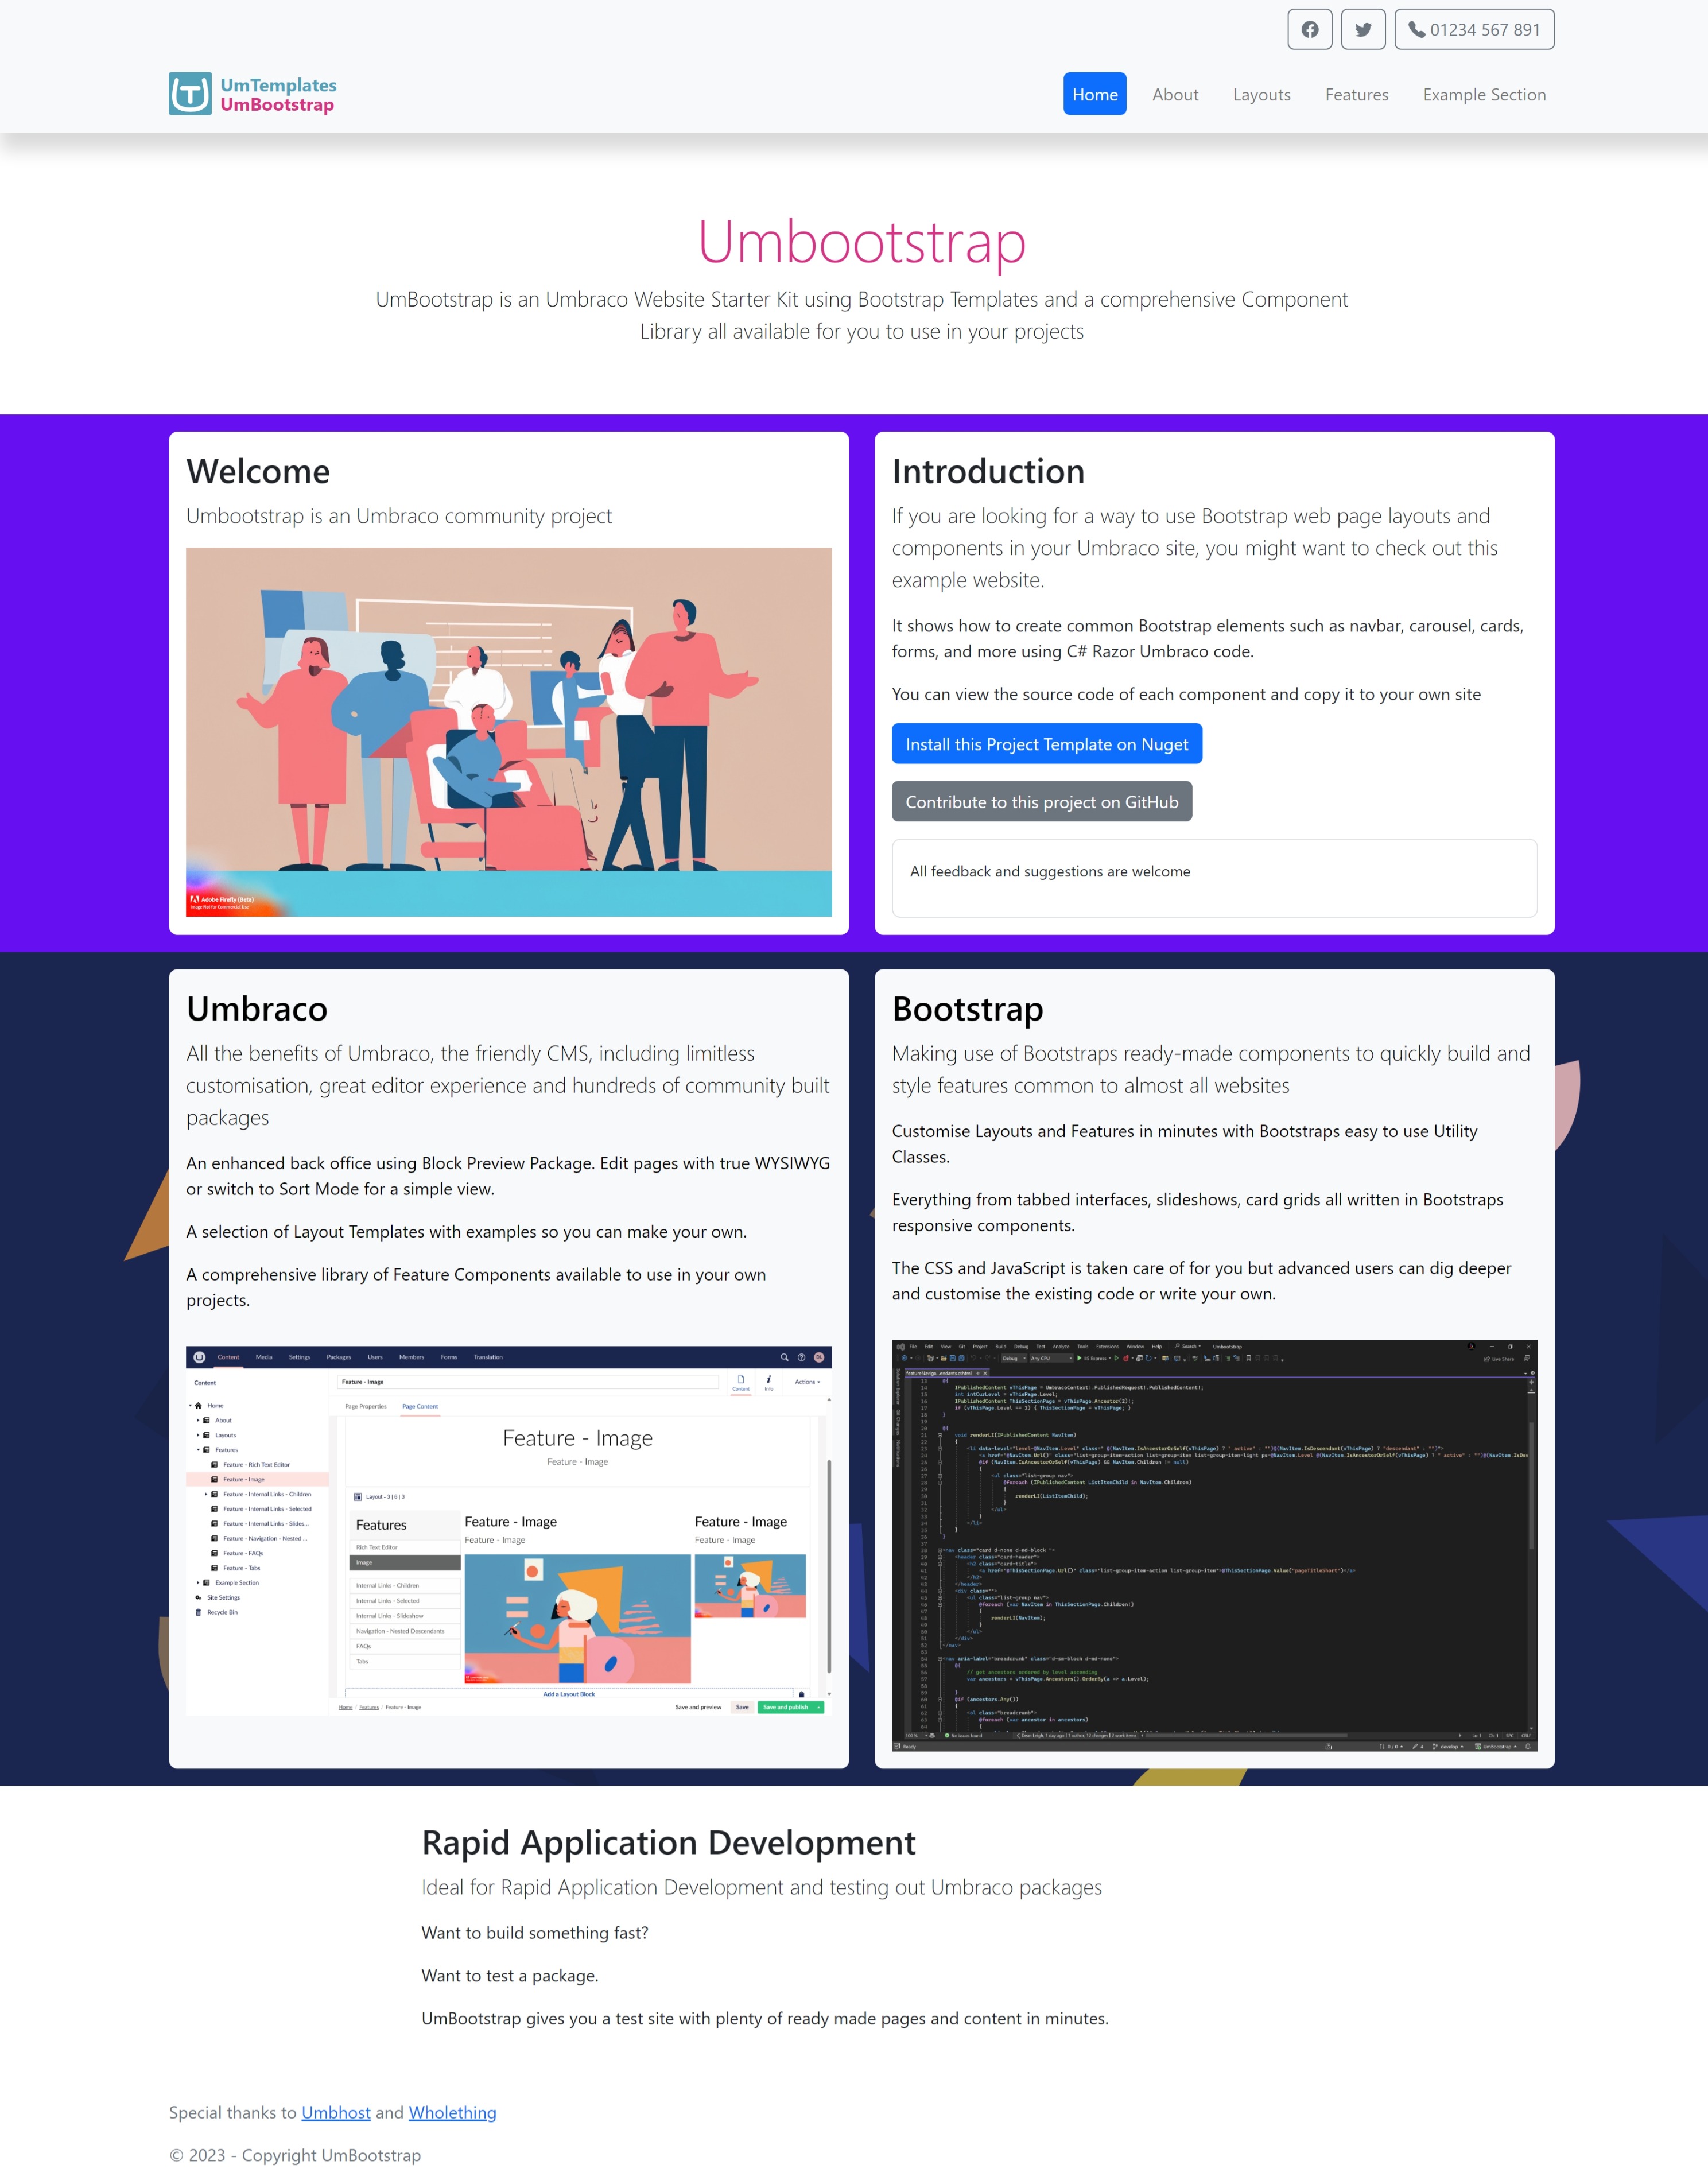
You can see the current example site here:

https://umbootstrap.com/

UmBootstrap

UmbBootstrap - Demo Site CI/CD

By Aaron Sadler

After Dean had finished building UmbBootstrap on his local machine, he approached me and asked if I could host the demo site on UmbHost via the Free Umbraco Community Hosting scheme.

During the discussions it was decided that the site needed to use GitHub Actions to make the deployment as smooth as possible when pushing changes to the demo site from Dean's machine. We agreed to make use of the UmbHost Web Deploy action combined with uSync configured to import the changes at startup.

To ensure the build process was efficient, we needed to enable a feature called RestorePackagesWithLockFile, this generates a file called packages.lock.json which contains the specific version of any NuGet packages installed along with a hash. This saves time by the build agent not needing to workout which NuGet packages are required for the build, it can simply restore the exact versions as defined in the file, it also allows for the hashes to be compared and will stop the build should they not match.

To enable this feature we needed to add the following line to the projects .csproj file:

<RestorePackagesWithLockFile>true</RestorePackagesWithLockFile>

The first part of the process was to add the Web Deploy credentials in to GitHub as repository secrets.

Repository secrets allow for sensitive information to be stored privately and securely, once saved the values cannot be seen again and only consumed by the GitHub agent.

These can be added by browsing to the repository Settings -> Secrets and variables -> Actions

The following repository secrets were added:

  • SOLUTION_NAME - The solution name including the .sln extension
  • SERVER_COMPUTER_NAME - The Web Deploy URL
  • USERNAME - The Web Deploy username
  • PASSWORD - The Web Deploy password

GitHub Actions Workflow

I will break down the YAML file I created for the GitHub actions workflow into the relevant parts to explain what is going on.

You can find the full YAML file as a GitHub Gist here.

At the beginning of the file we tell GitHub to monitor the main branch for commits, whenever there is a push to this branch it will trigger a run of the build workflow.

Next we set some environment variables to be used later by the dotnet build command.

on:
  push:
    branches: [ main ]
env:
    SolutionName: ${{ secrets.SOLUTION_NAME }}
    BuildPlatform: Any CPU
    BuildConfiguration: Release

The final configuration step before we add the build steps is to set the build agent type to be used, as we needed to use Web Deploy, we must set the build agent to be Windows based.

runs-on: windows-latest

The first build step is to tell the agent to clone down the repository

- name: Checkout
  uses: actions/checkout@v3

To speed up future builds, we want to make use of the caching feature, we are using the previously configured RestorePackagesWithLockFile for the caching, this will mean that for the next build, just as long as there are no NuGet package changes, the build agent won't need to query NuGet for each of the packages, download them and extract, instead it will download a single compressed file and extract that.

- uses: actions/cache@v3
   id: cache-nuget-umbhost
   with:
      path: |
         ~/.nuget/packages
      key: ${{ runner.os }}-nuget-${{ hashFiles('**/packages.lock.json') }}
      restore-keys: |
        ${{ runner.os }}-nuget-umbhost

Next we create a folder to contain the generated zip file from msbuild

- name: Create Build Directory
  run: mkdir _build

Now we need to build the package, in the command below we are passing in the SolutionName, BuildConfiguration and BuildPlatform environment variables set earlier.

You can read about the parameters used below with msbuild on the Microsoft Learn website.

- name: Build Solution
run: |
dotnet build ${{env.SolutionName}} /nologo /nr:false /p:DeployOnBuild=true /p:DeployDefaultTarget=WebPublish /p:WebPublishMethod=Package /p:PackageAsSingleFile=true /p:DeleteExistingFiles=True /p:SkipInvalidConfigurations=true /p:IncludeSetAclProviderOnDestination=False /p:AutoParameterizationWebConfigConnectionStrings=False /p:platform="${{env.BuildPlatform}}" /p:configuration="${{env.BuildConfiguration}}" /p:PackageLocation="../_build"

Finally once the build has finished we need to deploy this out to the server, below we are passing in the repository secrets we set earlier, as well as the source-path to the package and the package name, the package name is the same name as the Web .csproj filename.

- name: Deploy to UmbHost
  uses: UmbHost/umbhost-web-deploy@v1.0.1
  with:
     website-name: ${{ secrets.WEBSITE_NAME }}
     server-computer-name: ${{ secrets.SERVER_COMPUTER_NAME }}
     server-username: ${{ secrets.USERNAME }}
     server-password: ${{ secrets.PASSWORD }}
     source-path: '_build'
     source-fileName: Umbootstrap.Web.zip
uSync Import

Configuring uSync to run the import at startup is super simple, in the appsettings.json file you simply need to add the lines below:

"uSync": {
   "Settings": {
      "ImportAtStartup": "All"
   }
}

If you did not wish to import everything on each startup, you can change "All" to any one of the settings found in the appsettings.json reference here.

One caveat to having the import set to All, is that all changes including content must come from downstream, in this case the development environment, any changes made on the server would get overwritten the next time the site starts up.

Custom Dotnet Project Templates

By Dean Leigh

So was this a good idea? I had some great tips on creating Umbraco packages from Lotte Pitcher and the Umbraco community  in the past.

Umbraco community Discord to the rescue

On the 30th May 2023 I posted a question to the Umbraco Community #package-development channel on Discord and of course copied Lotte in:

Dean Leigh:

"Would a dotnet new template be a better option for a starter kit than a nuget package? //cc @Lotte"

Lotte Pitcher:

"I think for a starter kit, it would be a nicer experience for someone to add an Umbraco package to their existing Umbraco site via the nuget command but how would we manage content?"

Jason Elkin:

"I really dislike nuget packages creating content nodes, and think that templates conceptually fit what starter kits are supposed to do much better.
So you could have a dependency on uSync, include uSync definitions, and use ImportOnFirstBoot"

Dean Leigh:

"Aaron has already used ImportOnFirstBoot for publishing the site as part of the existing workflow"

Perfect! So now all we needed was to get the site into a custom Dotnet Project Template.

Umbracollab to the rescue

Lotte suggested we should attempt to convert UmBootstrap into a dotnet new project template as an Umbracollab session on Discord and record it to help others on YouTube

You can watch the video here:

You can follow the steps here:

Step 1 - Create the template

  1. Open the Project directory that you want to make into a dotnet project template
  2. At the same level as your 🗎 projectName.csproj file create a directory named 📁 .template.config
  3. Inside 📁 .template.config create a file named 🗎 template.json and add the basic json required

You could use the example below from:

Microsoft Learn: Create a project template


{
  "$schema": "http://json.schemastore.org/template",
  "author": "Me",
  "classifications": [ "Common", "Console" ],
  "identity": "ExampleTemplate.AsyncProject",
  "name": "Example templates: async project",
  "shortName": "consoleasync",
  "sourceName":"ExampleTemplate.AsyncProject",
  "tags": {
    "language": "C#",
    "type": "project"
  }
}

template.json

And here is the 🗎 template.json file we use for UmBootstrap


{
  "$schema": "http://json.schemastore.org/template",
  "author": "Dean Leigh",
  "classifications": [ "Web", "CMS", "Umbraco", "Bootstrap", "Starter Kit" ],
  "name": "Umbraco UmBootstrap Starter Kit",
  "description": "A project template for creating a new Umbraco site using the UmBootstrap Starter Kit",
  "identity": "Umbraco.Community.Templates.UmBootstrap",
  "shortName": "umbootstrap",
  "tags": {
    "language": "C#",
    "type": "project"
  },
  "preferNameDirectory": true,
  "sourceName": "Umbootstrap.Web",
  "guids": [ "0f2709dd-6052-4c76-b78c-2e2a2da6e8c4" ],
  "symbols": {
    "httpPort": {
      "type": "generated",
      "generator": "port",
      "parameters": {
        "fallback": 5000
      },
      "replaces": "36139"
    },
    "httpsPort": {
      "type": "generated",
      "generator": "port",
      "parameters": {
        "low": 44300,
        "high": 44399,
        "fallback": 5001
      },
      "replaces": "44395"
    },
    "ConnectionString": {
      "displayName": "Connection string",
      "description": "Database connection string used by Umbraco.",
      "type": "parameter",
      "datatype": "string",
      "defaultValue": "",
      "replaces": "Data Source=|DataDirectory|/Umbraco.sqlite.db;Cache=Shared;Foreign Keys=True;Pooling=True"
    },
    "ConnectionStringProviderName": {
      "displayName": "Connection string provider name",
      "description": "Database connection string provider name used by Umbraco.",
      "type": "parameter",
      "datatype": "string",
      "defaultValue": "Microsoft.Data.SqlClient",
      "replaces": "Microsoft.Data.Sqlite"
    }
  },
  "sources": [
    {
      "modifiers": [
        {
          "exclude": [
            "umbraco/Logs/**",
            "umbraco/Data/**",
            "umbraco/Licenses/**"
          ]
        }
      ]
    }
  ]
}

template.json for UmBootstrap

As you can see parameters have been set for things like the port range, replacing the connection string, excluding files and folders from the template.

Dotnet project templates are highly configurable, more so than we can cover in this article but a good place to start is here:

Custom templates for dotnet new

And a few helpful examples can be found here:

Dotnet Templating Cheat Sheet

Step 2 - Install the template

  1. In your console of choice browse to your project directory that contains 📁 .template.config
  2. Run the following command dotnet new install .\
  3. This will search for 📁 .template.config and will install 🗎 template.json

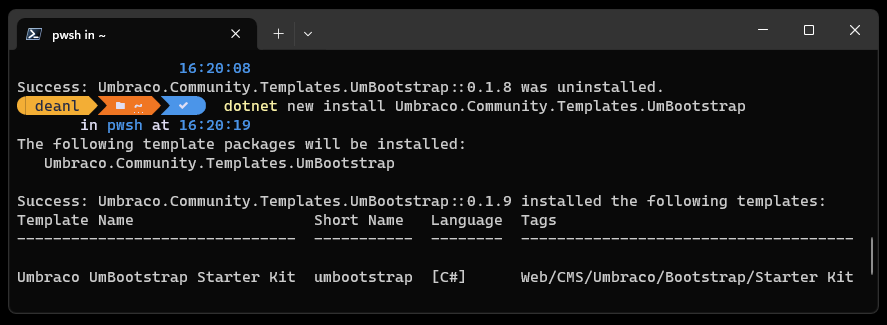
You should see a "Success" message like the one in the image below:

dotnet new install showing the template successfully installed

dotnet new install success message

Step 3 - Check the template is installed

To check that your new template is installed correctly and available to use run:

dotnet new list

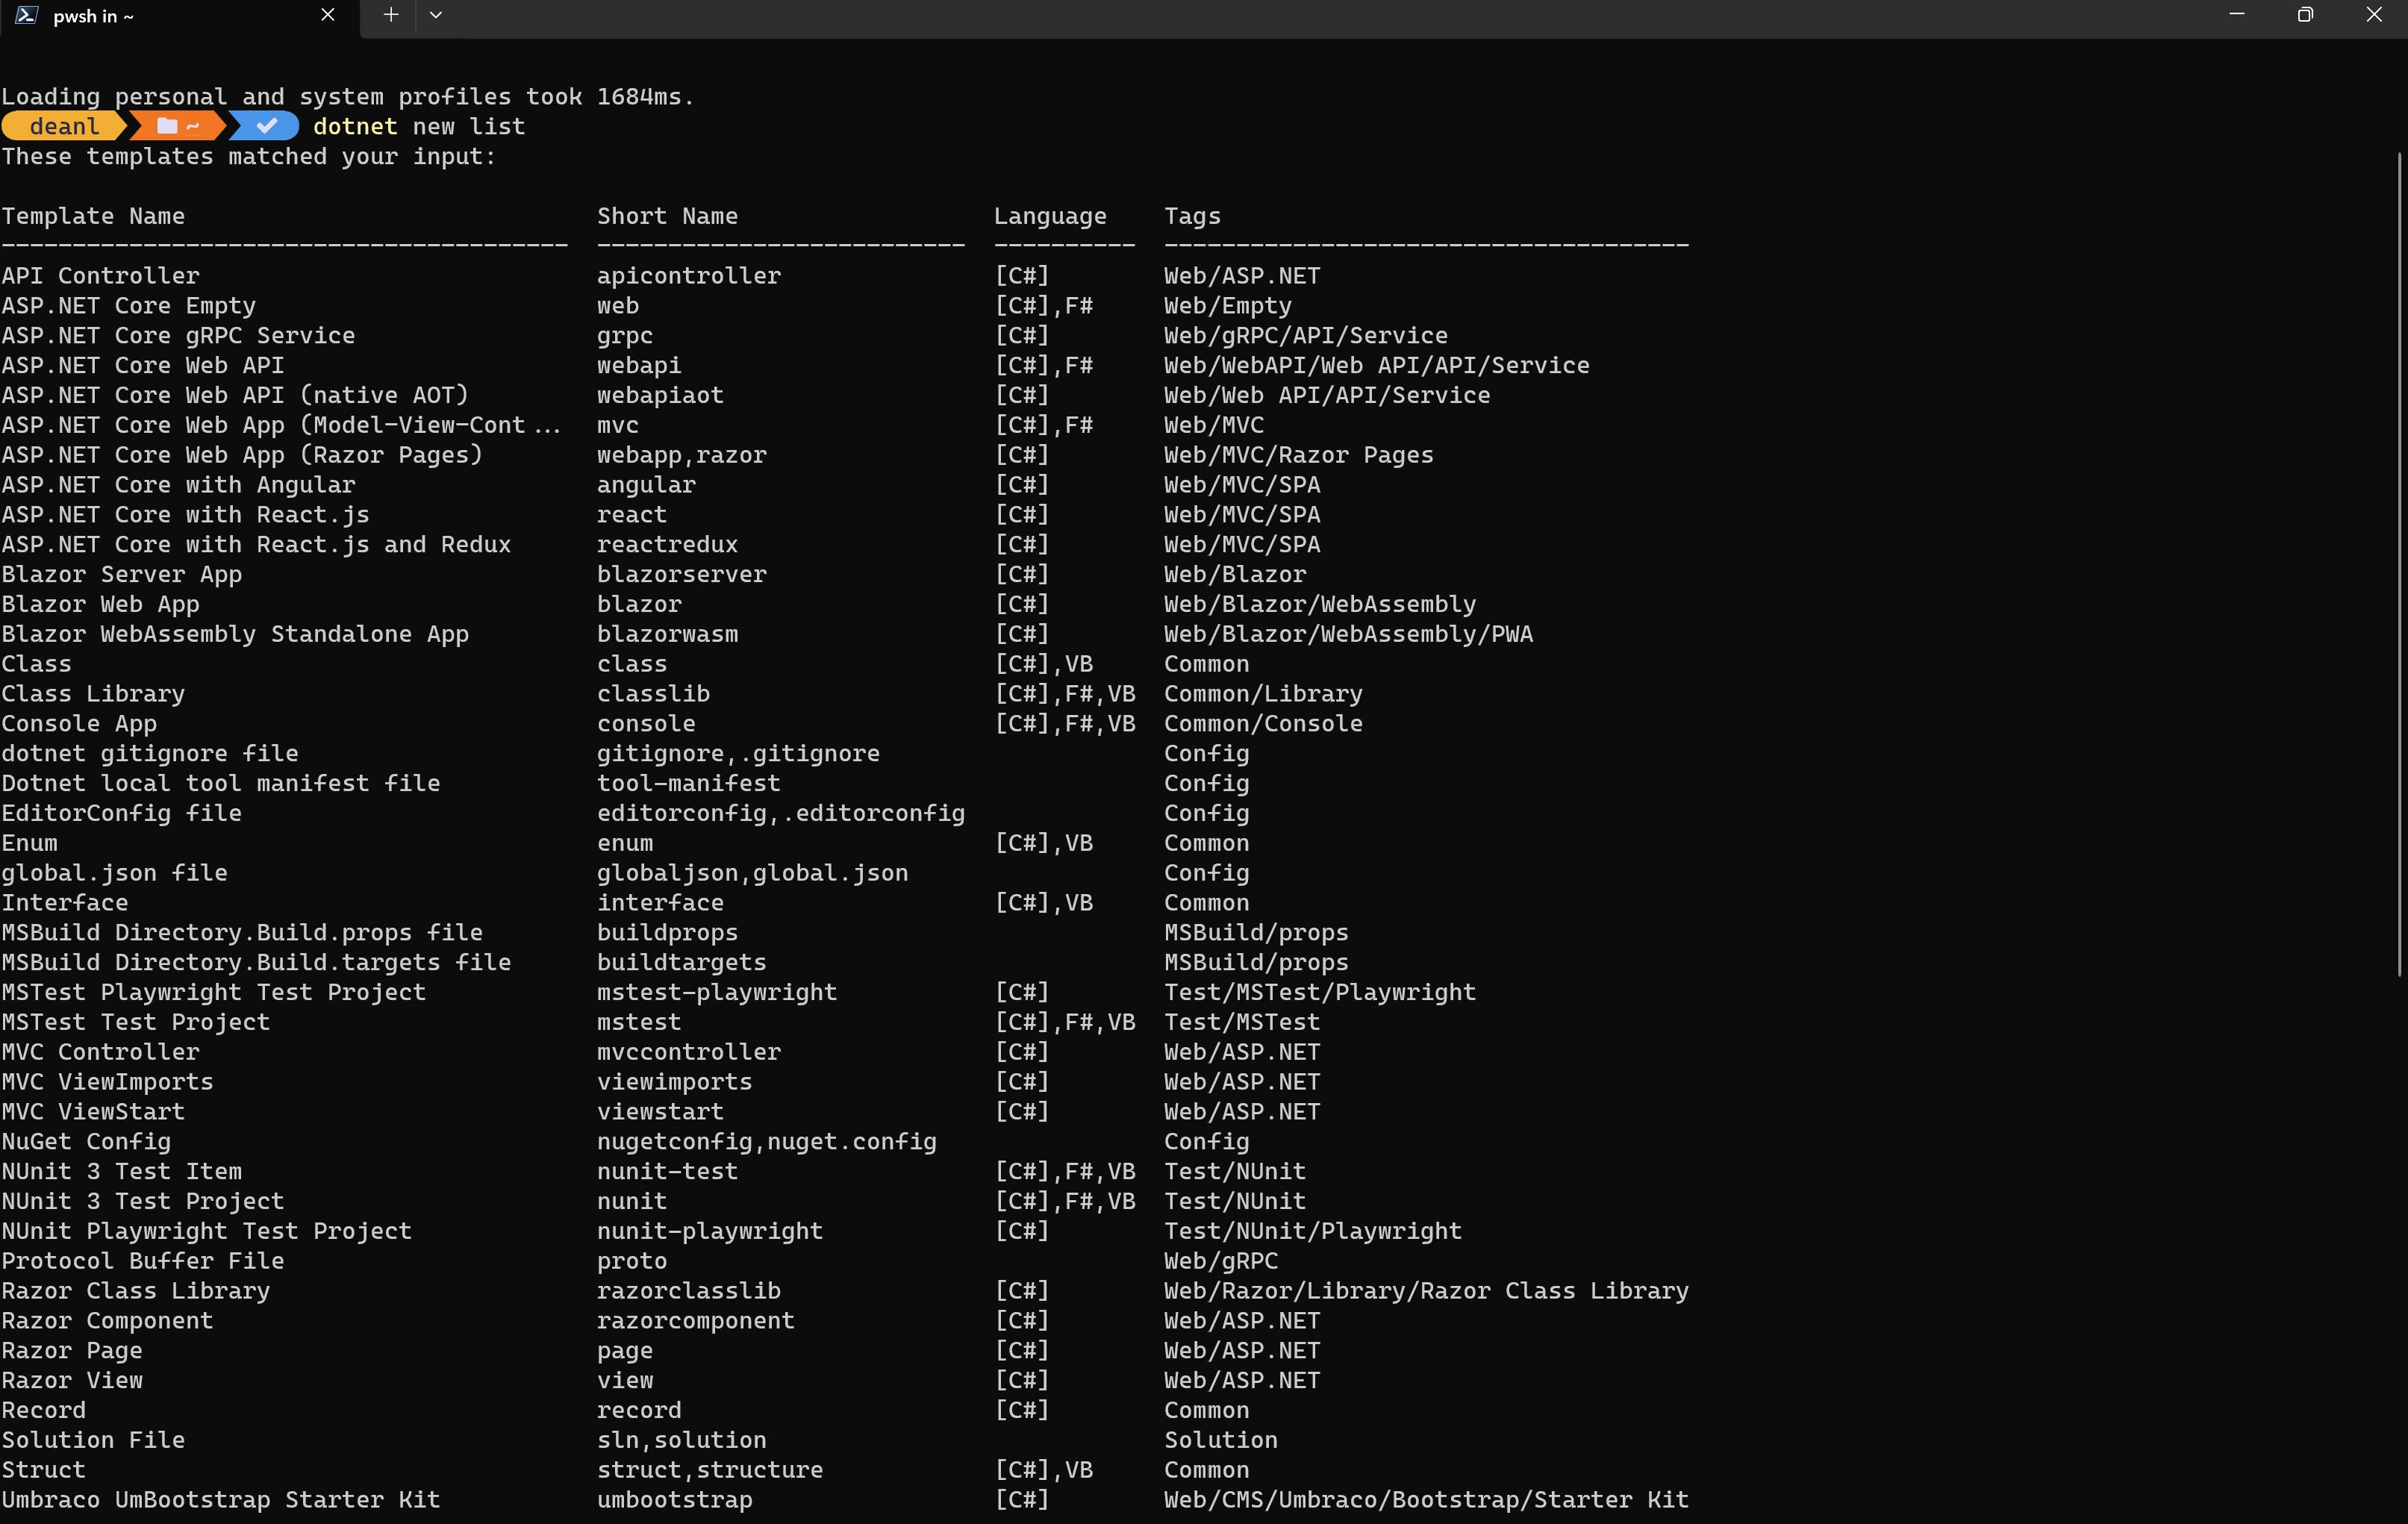
This will generate a list of 'all' dotnet project templates on your machine as shown in the image below showing UmBootstrap as the last item:

A list of installed dotnet new templates

dotnet new list

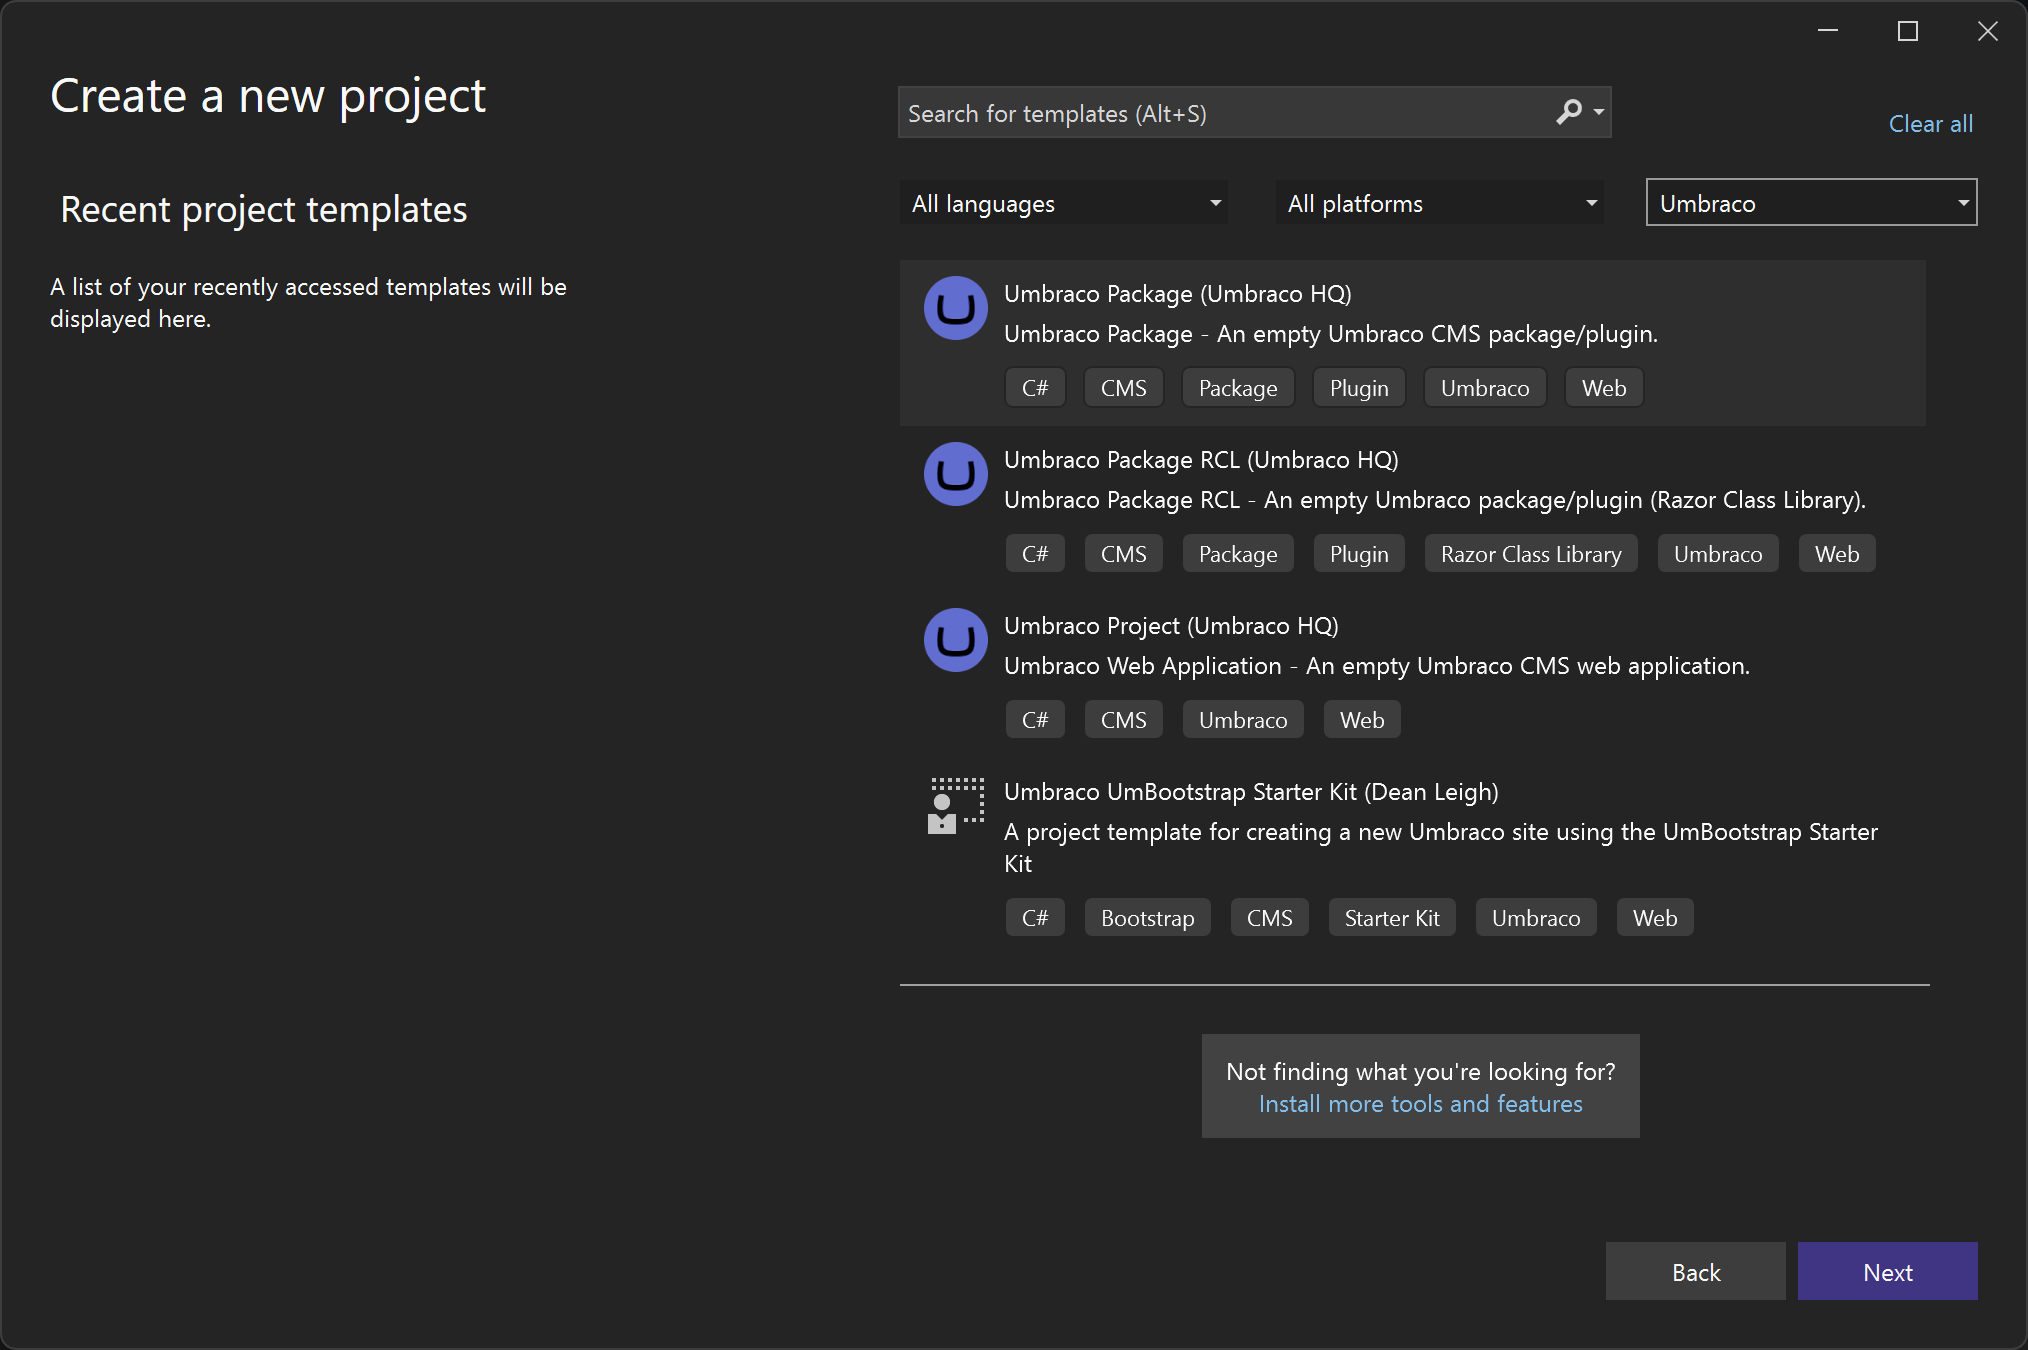
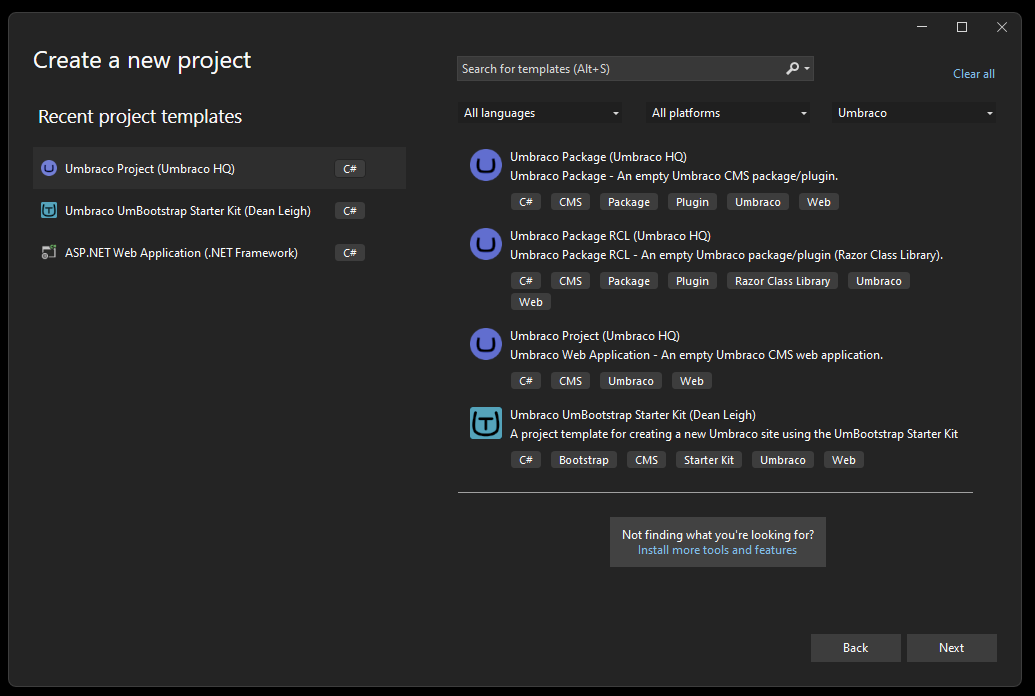
In Visual Studio a locally installed package should appear as per the image below:

A local dotnet new package appearing in the list in Visual Studio

A local dotnet new package appearing in the list in Visual Studio

Tip

If you need to uninstall your template at some point you run:

dotnet new uninstall

You will get a list of templates and the commands to uninstall them

You can see many more dotnet new list commands here:

dotnet new list

Note

Bear in mind the template is currently only installed your machine.

If you make changes to the project they should be reflected each time you run the template. However, you may need to uninstall and reinstall the template for the changes to take effect. 

Step 4 - Run the template

  1. Choose or create a 📁 directory where you wish to create your project (in this case website)
  2. Run the following command in your command prompt

dotnet new [template name] --name [directory/project name]

[template name] = The name of the dotnet project template

[directory/project name name] = we have set a parameter to replace our name with the one chosen by the user where that namespace is used. You can configure naming in many ways, again refer to the Microsoft Documentation for more options.

You should now have a copy of your project in a 📁 directory with the chosen name.

You can now run the project from within Visual Studio or with the command:

dotnet run

All being well your should now have a working copy of your project from the template 🎉

Share your package

So you now have a working package on your local machine but you want to share it with the world.

Of course you can make it open source on github but forking it would copy over the project in it's entirety.

This is fine for contributors but we want to share it as a dotnet project template.

Up steps our old friend Nuget.

Yes, that's correct, dotnet projects templates are a variant of nuget packages and are stored on nuget.org.

For example here is UmBootstrap:

https://www.nuget.org/packages/Umbraco.Community.Templates.UmBootstrap

So how do we package up our template and make it available to other users as a dotnet project template?

Step 1 - Create a Template Package Project

  1. Navigate to the 📁 directory above the directory you wish to pack.
    (Often the root of the repo or where your *.sln file is)
  2. Create a Template Package Project file named 🗎 template-pack.csproj

You will need to add and edit the XML required, luckily Microsoft have an example file you can install at:

Create a template package project

There are numerous parameters that can be customised but if you want to also be listed in Umbraco Marketplace ensure you have a Package Reference set to Umbraco as follows:

<ItemGroup>
    <PackageReference Include="Our.Umbraco.UmbNav.Web" Version="2.0.8" />
    <PackageReference Include="System.Drawing.Common" Version="7.0.0" />
    <PackageReference Include="Umbraco.Cms" Version="10.6.1" />
  </ItemGroup>

Here is the file we use for UmBootstrap


<Project Sdk="Microsoft.NET.Sdk">

  <PropertyGroup>
    <PackageType>Template</PackageType>
    <PackageId>Umbraco.Community.Templates.UmBootstrap</PackageId>
    <Title>Umbraco.Community.Templates.UmBootstrap</Title>
    <Authors>Dean Leigh</Authors>
    <Description>A project template for creating a new Umbraco site using the UmBootstrap Starter Kit</Description>
    <PackageTags>dotnet-new;templates;umbraco;bootstrap;umbraco-marketplace</PackageTags>

    <TargetFramework>net6.0</TargetFramework>

    <IncludeContentInPack>true</IncludeContentInPack>
    <IncludeBuildOutput>false</IncludeBuildOutput>
    <ContentTargetFolders>content</ContentTargetFolders>
    <NoWarn>$(NoWarn);NU5128</NoWarn>
    <NoDefaultExcludes>true</NoDefaultExcludes>
    <Copyright>$([System.DateTime]::UtcNow.ToString(`yyyy`)) © Dean Leigh</Copyright>
    <PackageIcon>icon_nuget_umbootstrap.png</PackageIcon>
    <PackageReadmeFile>README.md</PackageReadmeFile>
    <RepositoryUrl>https://github.com/UmTemplates/UmBootstrap</RepositoryUrl>
    <PackageProjectUrl>https://umbootstrap.com</PackageProjectUrl>
    <RepositoryType>git</RepositoryType>
    <PackageLicenseExpression>MIT</PackageLicenseExpression>
  </PropertyGroup>

  <ItemGroup>
    <Content Include="Umbootstrap.Web\**\*" Exclude="Umbootstrap.Web\**\bin\**;Umbootstrap.Web\**\obj\**" />
    <Compile Remove="**\*" />
    <None Include="assets\README_nuget.md" Pack="true" PackagePath="\" />
    <None Include="assets\icon_nuget_umbootstrap.png" Pack="true" PackagePath="\" />
  </ItemGroup>

  <ItemGroup>
    <PackageReference Include="Our.Umbraco.UmbNav.Web" Version="2.0.8" />
    <PackageReference Include="System.Drawing.Common" Version="7.0.0" />
    <PackageReference Include="Umbraco.Cms" Version="10.6.1" />
  </ItemGroup>

  <ItemGroup>
    <None Update="README.md">
      <Pack>True</Pack>
      <PackagePath>\</PackagePath>
    </None>
  </ItemGroup>

</Project>

Tip

You can create three separate 🗎 README.md files for:

- GitHub
- Nuget
- Umbraco Marketplace

But, if you want to use the same markdown you can use a single 🗎 README.md for all three.

You will need to reference the location your files (and images).

Step 2 - Pack the Project

Run the following command on the directory containing your 

dotnet pack

There is a full set of commands that can be used and arguments that can be set here:

dotnet pack

Step 3 - Upload the project to Nuget

There are several methods of uploading (and maintaining versions of) your project to Nuget.

The simplest way is to upload you package via the Nuget website.

A comprehensive set of instructions can be found here:

Publish NuGet packages

Once your Project Template is available it will appear in the list in Visual Studio to all users unlike the local version we saw earlier:

UmBootstrap appearing in the list of templates in Visual Studio

UmBootstrap appearing in the list of templates in Visual Studio

Step 4 - Add to Umbraco Marketplace

The simplest way to add your package to Umbraco Marketplace is to ensure

  • The umbraco-marketplace tag is added to your NuGet package
  • It meets the minimum Umbraco version requirement: Umbraco 8

However, you can add additional package information by creating an 🗎 umbraco-marketplace.json file using the following instructions:

Listing Your Package

Conclusion

So not only have we learned how to build a custom dotnet project template that is also it’s own example website using Usync, CI/CD and GitHub actions, we have learned how to share it with others.

This is why OSS is so powerful when you can create a project with the help of the community for the benefit of the community.

This is very much the strength of the Umbraco community and Aaron Sadler and I could not have done it without the help of others.

A special mention to:
Rick Butterfield for the fantastic Block Preview package,
Paul Seal for inspiration (Clean Starter Kit) and some code help,
Kevin Jump without Usync this would have been a lot more work,
and of course Lotte Pitcher who listened to an idea and helped make it happen