Last year, we wrote an article about how Umbraco can be hosted within a Kubernetes cluster on Azure. But why not take a look at whether it's also possible to host Umbraco within AWS? Why? Just because it's fun. In this blog, we will take you through the experiences we've gained when hosting Umbraco within AWS.
Setup
Let’s start with a little overview of the resources that are used in this setup. Umbraco runs in a load balanced environment. This means that we have one Umbraco backoffice and multiple frontend instances. All media files are stored in an S3 bucket and of course we have an MS SQL database available.
Besides the resources we need to run Umbraco, a container registry is needed to push new versions of the application. In AWS, we use Amazon ECR (ECR).
Service Connection
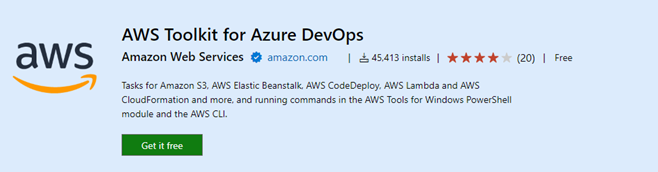
First of all you have to create a service connection in Azure DevOps. There are a lot of connections possible in Azure DevOps, but adding a service connection to AWS is not possible by default. Fortunately there is an extension (AWS Toolkit for Azure DevOps) available in the marketplace.
You can easily install this extension by following the link and clicking the 'Get it free' button:
AWS DevOps Extension
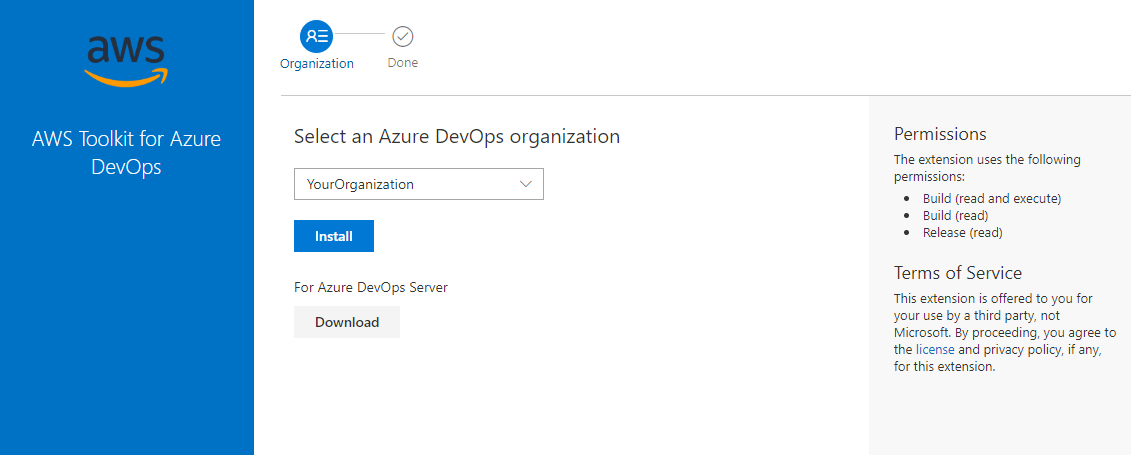
If you have the right permissions you will be able to install the extension to your (or one of your) organizations. Choose the desired organization and click install:
Install AWS AzureDevOps Extension
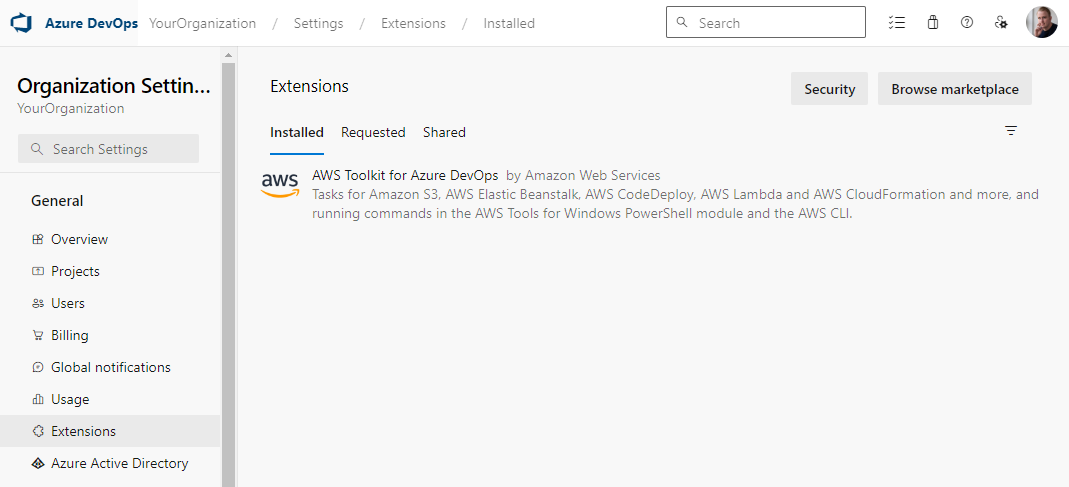
After installing the extension you can find it under organization settings --> extensions:
Azure DevOps Extensions
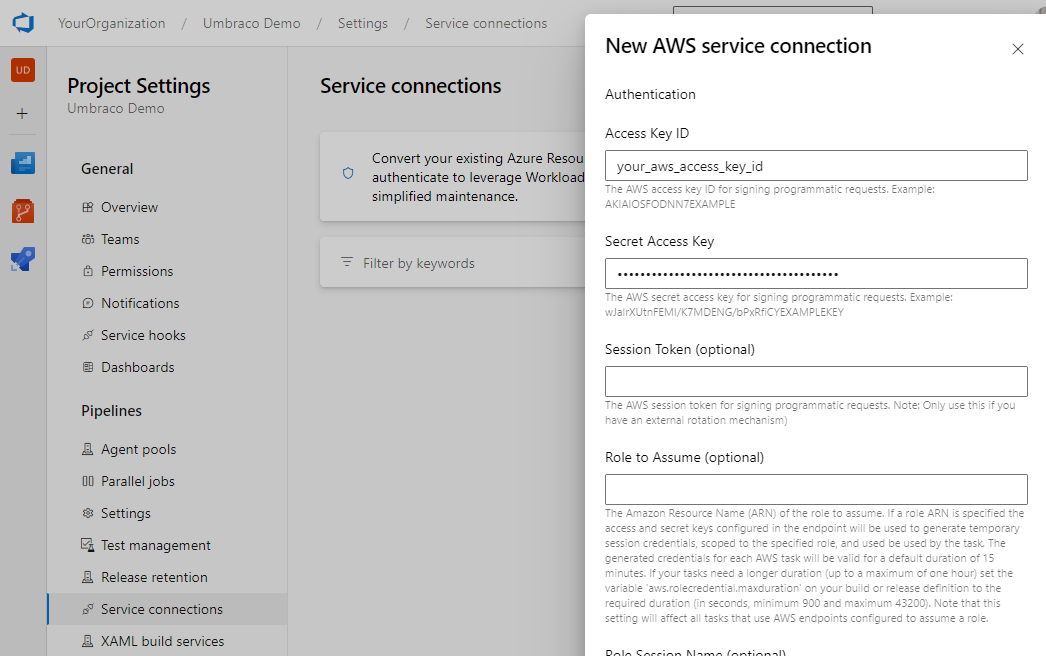
Now it's time to establish the service connection. Navigate to the project settings and then to service connections. Click on the 'Create Service Connection' button and select AWS. Provide the Access Key ID and Secret Access Key, ensuring to set 'Grant access permissions to all pipelines' to 'true' before saving.
Add AWS Service Connection
Now that we have a service connection, we are almost ready to initiate a release. However, first, we need to ensure that Umbraco is configured to use an S3 Bucket and that a connectionstring can be built. Let's start with the S3 configuration.
Configure the S3 Bucket
Fortunately, there is a package called the AWS S3 Media File System Provider, which enables Umbraco to utilize an S3 Bucket as a storage provider for media files. Installing this package is a straightforward process accomplished by updating the .csproj file of our web project.
Add the Our.Umbraco.StorageProviders.AWSS3 package to the .csproj file
After successfully installing the package, it's time to configure it and instruct Umbraco on where to locate and create media files. This can be accomplished effortlessly by invoking the `AddAWSS3MediaFileSystem` extension method within the `Startup.cs` class, as illustrated below:
public class Startup
{
    ...
    public void ConfigureServices(IServiceCollection services)
    {
        services.AddUmbraco(_env, _config)
            .AddBackOffice()
            .AddWebsite()
            .AddDeliveryApi()
            .AddComposers()
            .AddAWSS3MediaFileSystem()
            .Build();
    }
	...
}
Update ConfigureServices() to configure S3 Bucket
Last step to configure Umbraco to use the S3 Bucket is to add the bucket name to the appsettings.json like so:
Note
Note that if you want to test this locally, you need to be logged in using the AWS CLI
Because the appsettings.json is part of the docker image, it is not possible to edit it during the release process. We have solved this by adding the connectionstring as one of the environment variables and reading them when the application starts. In the AWS Secret Manager, we have added the SERVER, DATABASE, USERNAME, and PASSWORD secrets.
In the Program.cs file, we retrieve these variables and call an extension method to configure the connectionstring. The final result of the Program.cs file is as follows:
namespace UmbracoDemo;

public class Program
{
    public static void Main(string[] args)
        => CreateHostBuilder(args)
            .Build()
            .Run();

    public static IHostBuilder CreateHostBuilder(string[] args) =>
        Host.CreateDefaultBuilder(args)
            .ConfigureLogging(x => x.ClearProviders())
            .ConfigureAppConfiguration((context, config) =>
            {
                var server = Environment.GetEnvironmentVariable("DB_HOST");
                var database = Environment.GetEnvironmentVariable("DB_NAME");
                var username = Environment.GetEnvironmentVariable("DB_USERNAME");
                var password = Environment.GetEnvironmentVariable("DB_PASSWORD");

                config.AddUmbracoConnectionString("server={0};database={1};user id={2};password='{3}'", server!, database!, username!, password!);
            })
            .ConfigureUmbracoDefaults()
            .ConfigureWebHostDefaults(webBuilder =>
            {
                webBuilder.UseStaticWebAssets();
                webBuilder.UseStartup<Startup>();
            });
}
Program.cs
As seen in the Program.cs file, an extension method called AddUmbracoConnectionString is called. This method ensures that the environment variables that have been read collectively form a connection string, which is then added to the configuration. The code below illustrates how this is done:
Now that we have also configured the S3 Bucket and can retrieve the connection string, it's time to start the actual release process. We have chosen to create two pipelines. The first one is for building the application and pushing an image to the ECR, the 'containerize pipeline.' The second one performs the actual release of the application.
Containerize
To create an image, we first need a Dockerfile. We have added a Dockerfile to our web project, which we later use from the pipeline. The Dockerfile performs the following actions:
Get the .NET SDK
Create a Working Directory
Copy solution projects to the working directory
dotnet restore
dotnet build
dotnet publish
Create an entry point
# Use the official ASP.NET runtime image as the base
FROM mcr.microsoft.com/dotnet/aspnet:7.0 AS base

# Set the working directory to /app
WORKDIR /app

# Expose ports 80 and 443 for the application
EXPOSE 80
EXPOSE 443

# Use the official .NET SDK image for building
FROM mcr.microsoft.com/dotnet/sdk:7.0 AS build

# Set the working directory to /src
WORKDIR /src

# Copy the project files to the working directory
COPY ["UmbracoDemo.Web.UI/UmbracoDemo.Web.UI.csproj", "UmbracoDemo.Web.UI/"]
COPY ["UmbracoDemo.Business/UmbracoDemo.Business.csproj", "UmbracoDemo.Business/"]
COPY ["UmbracoDemo.Core/UmbracoDemo.Core.csproj", "UmbracoDemo.Core/"]
COPY ["UmbracoDemo.Data/UmbracoDemo.Data.csproj", "UmbracoDemo.Data/"]
COPY ["UmbracoDemo.Web.BackOffice/UmbracoDemo.Web.BackOffice.csproj", "UmbracoDemo.Web.BackOffice/"]
COPY ["UmbracoDemo.Web.Website/UmbracoDemo.Web.Website.csproj", "UmbracoDemo.Web.Website/"]

# Restore NuGet packages
RUN dotnet restore "UmbracoDemo.Web.UI/UmbracoDemo.Web.UI.csproj"

# Copy the remaining source code
COPY . .

# Set the working directory to the project folder
WORKDIR "/src/UmbracoDemo.Web.UI"

# Build the application in Release mode
RUN dotnet build "UmbracoDemo.Web.UI.csproj" -c Release -o /app/build

# Create the publish stage
FROM build AS publish

# Publish the application
RUN dotnet publish "UmbracoDemo.Web.UI.csproj" -c Release -o /app/publish

# Create the final image using the base image
FROM base AS final

# Set the working directory to /app
WORKDIR /app

# Copy the published files to the final image
COPY --from=publish /app/publish .

# Set the entry point for the application
ENTRYPOINT ["dotnet", "UmbracoDemo.dll"]
Dockerfile
Next step is the pipeline itself. We created a folder called Pipelines in azure DevOps and add a file named aws-containerize.yml. This pipeline has a job with a couple of steps.
The pipeline is configured to trigger on changes to the develop branch, ensuring that every commit to this branch initiates the CI/CD process. Additionally, it is set to have no triggers for pull requests.
Stages and Jobs
This pipeline defines a single stage named "Docker," which encapsulates the entire build and push process. Within this stage, there's a job named "Build_and_Push" responsible for executing the necessary tasks.
Build Steps
Step 1: Install NPM Packages
The first step installs NPM packages for a specific directory in the repository.
Step 2: Build Front-end with Gulp
This step executes a Gulp script to build the front-end of the Umbraco application.
Step 3: Build Docker Image
The third step involves building a Docker image using a specified Dockerfile and repository name.
Step 4: Push Docker Image to AWS ECR
The final step pushes the Docker image to AWS ECR. It uses AWS credentials and specifies the region, image source, and tag.
Release
Now that the containerized pipeline is completed, and we have a final version of the application available in the Amazon Elastic Container Registry (ECR), it's time to create the release pipeline. We have opted to make this a separate pipeline so that we can initiate it independently of the containerized pipeline. Currently, this pipeline does not have multiple stages, but in the future, the intention is to enable specifying the environment to which the final version should be deployed. The release will be targeted to the AWS Elastic Container Service (ECS) for deployment. The pipeline looks like this:
This pipeline is configured to use an Ubuntu-based virtual machine. The job, named "UpdateAWSService," executes the AWS CLI task to update the ECS service. The specified arguments include the ECS cluster name, service name, and the --force-new-deployment flag to trigger a new deployment.
We hope that we have provided an idea of how to set up a CI/CD process for an Umbraco installation hosted within AWS.