Configure Azure for Your Umbraco Media

tagged with Azure Configuration Media v10

A step-by-step guide to setup Azure resources and configure your Umbraco website to use Azure Blob Storage for your media.

We’ve all been there, migrating content within Umbraco only to realize that all media needs to move through your development, staging, and production environments. It can be a time-consuming hassle, but it is a necessary part of the deployment process for content management. Luckily, we can mitigate this hassle by utilizing Azure blob storage as a single source of hosted media for all our environments.

The challenge that you may face here is that setting up Azure can be very confusing. There are a few considerations to take into account with your development process if you want to utilize Azure including:

  • The cost. While the cost may not be expensive and greatly depends on your use, it is not a completely free service. Microsoft does provide a pricing calculator on its website in order to help estimate your costs up front.
  • If you need to utilize the media on your local environment, you will need access to the internet.
  • If you have multiple developers working on your project with their own databases, you may need to configure separate blob storage accounts and config transformations.

If these are things you can work through, then utilizing Azure blob storage may be a good fit for your Umbraco media.

Prerequisite

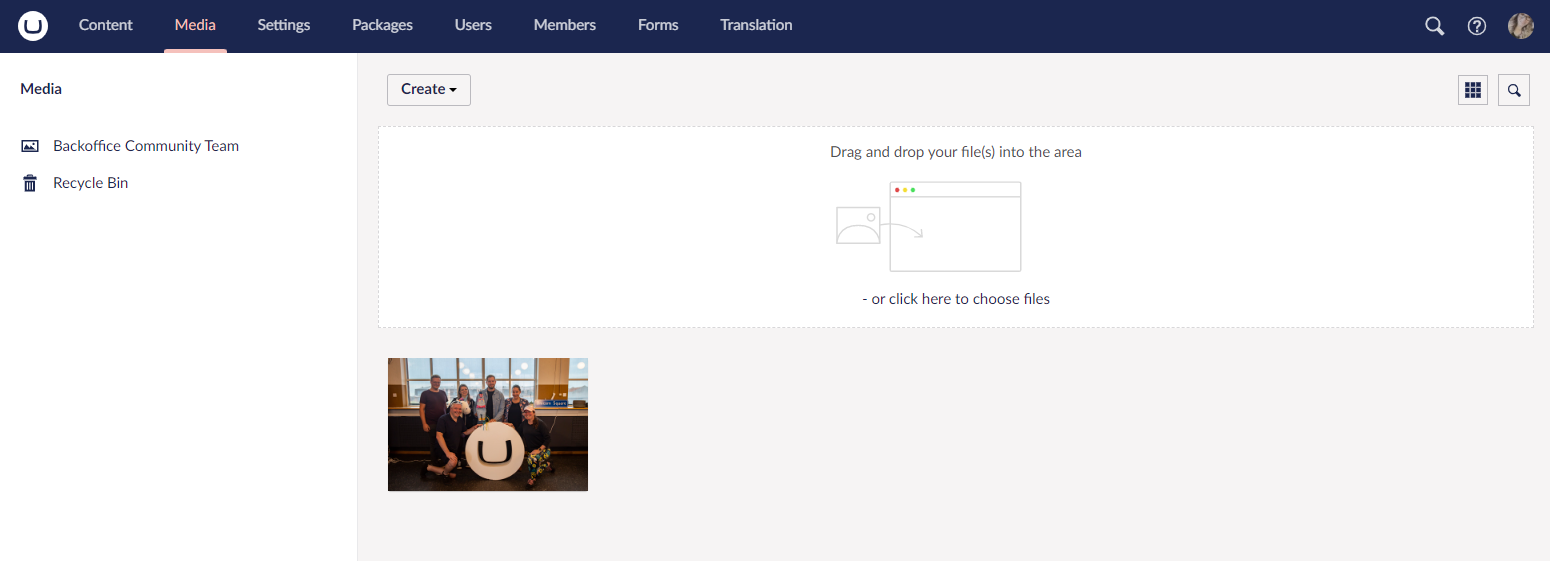
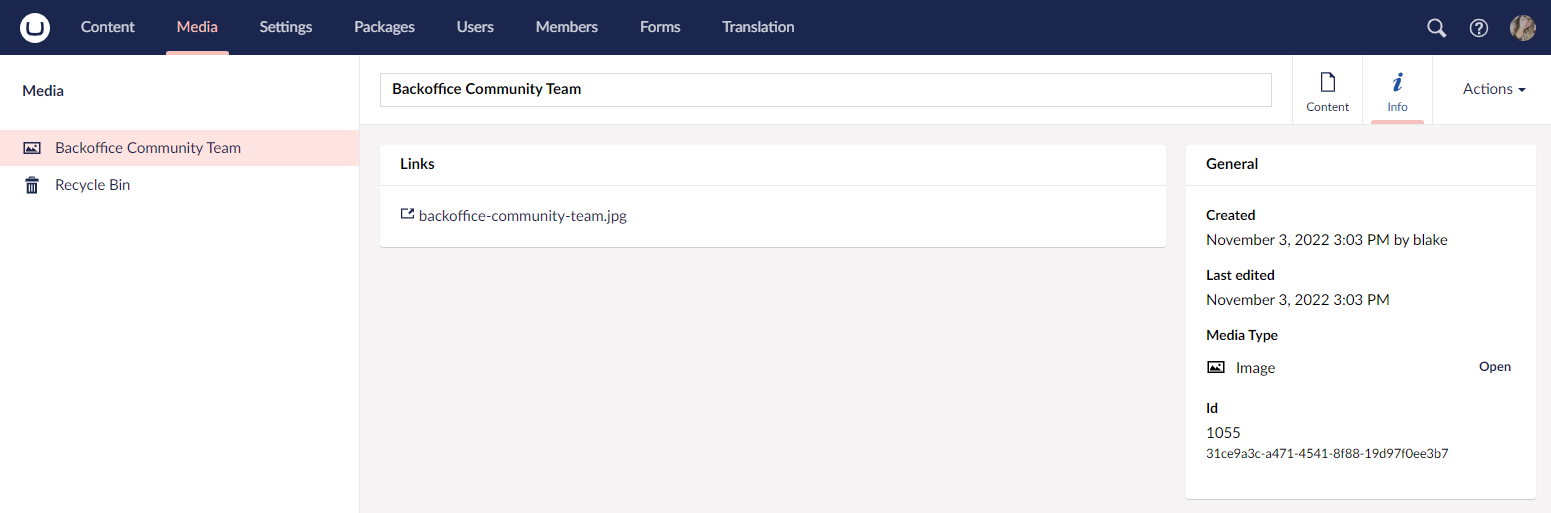
These steps will get you rolling with setting up and configuring Azure blob storage for use with your Umbraco 10 website media assuming you already have installed Umbraco.

For demo purposes, you can install a starterkit so you can view your media on your website, but it's not required for this guide.

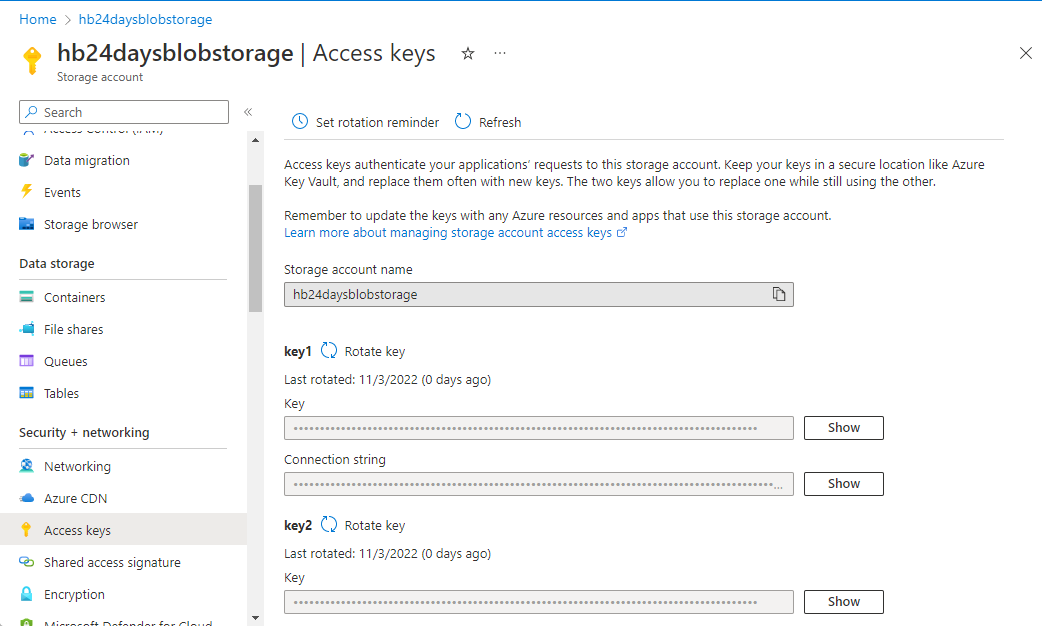
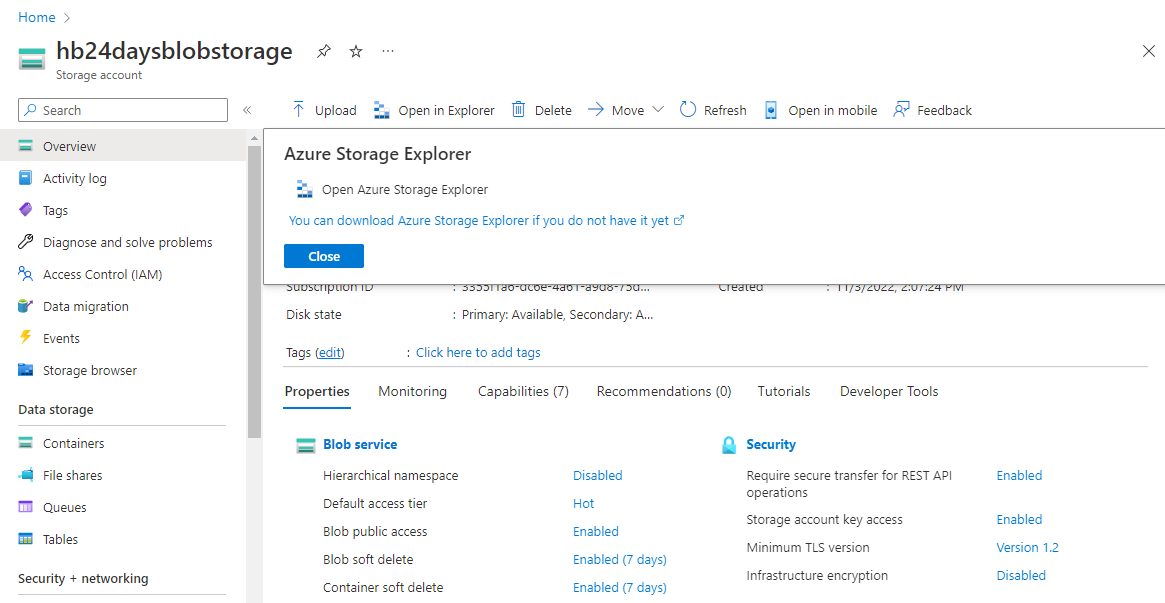
Configure Azure Resources

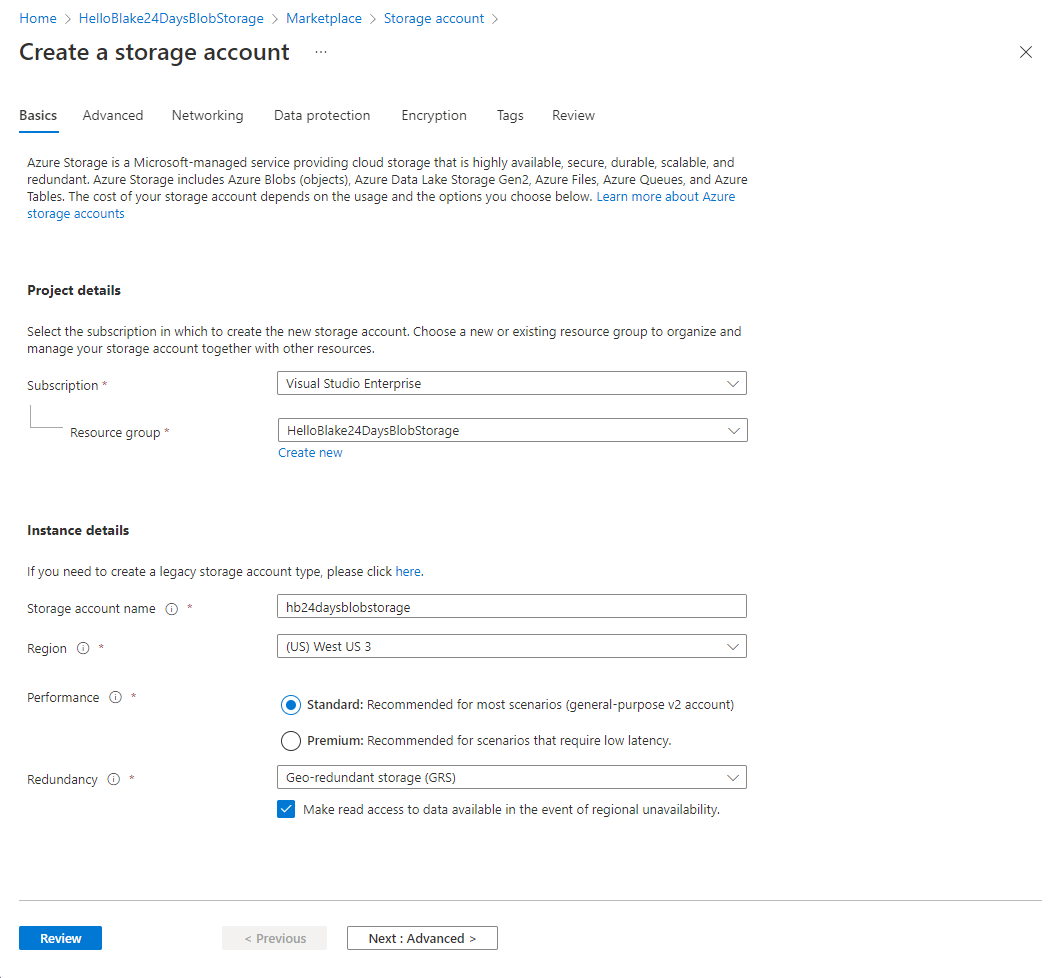
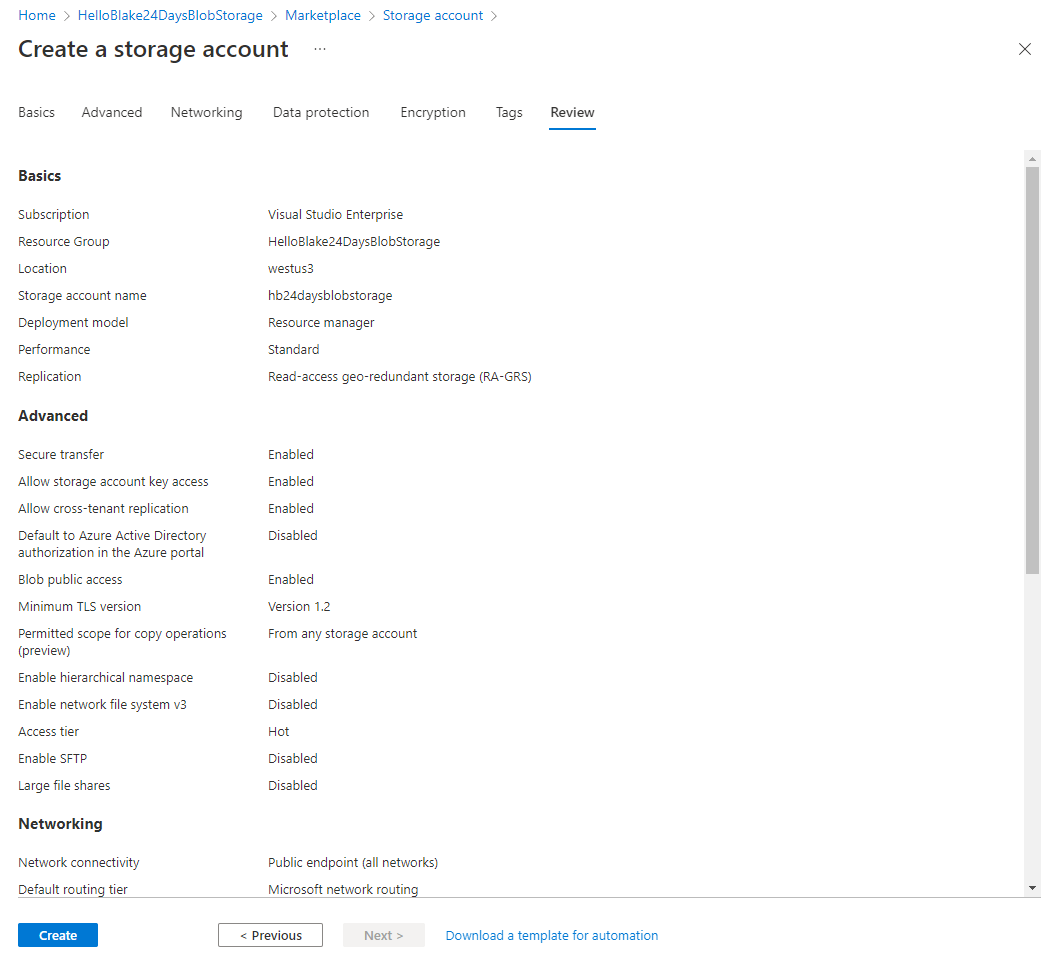
First, we will configure Azure with a resource group, storage account, and storage container so that we have the necessary resources for our Umbraco website.

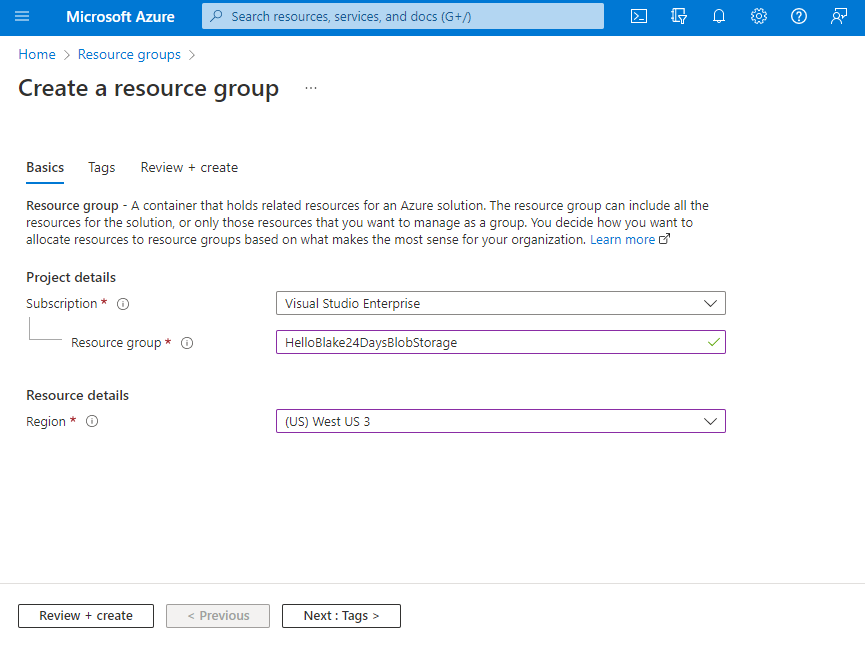
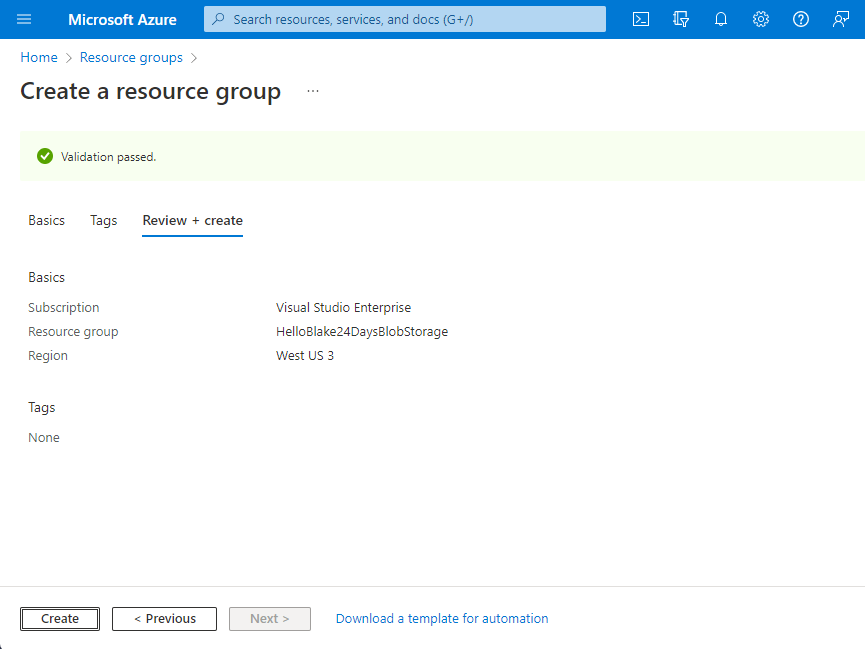
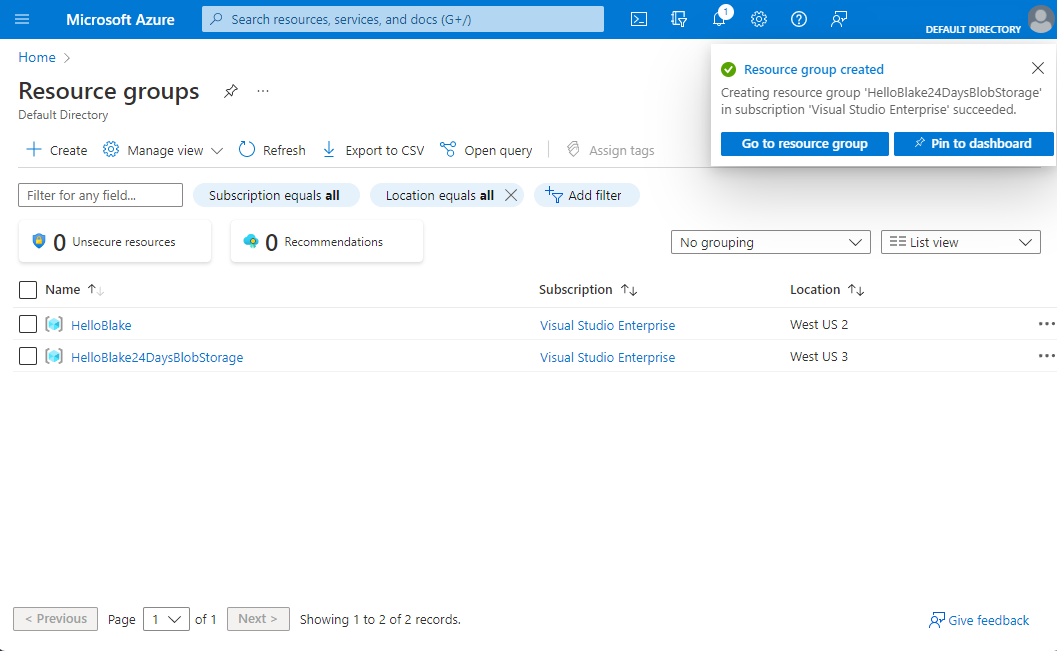
Create a Resource Group

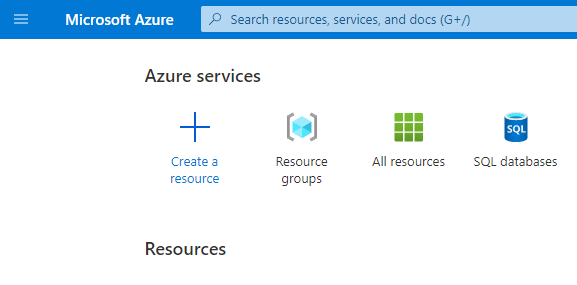
To get started, you need to log in to the Azure portal with your Microsoft account. Once you get into the portal you will see Create a resource. Here you want to click on Resource groups and click Create.

Create Resource Dashboard Menu

On the Create a resource group screen you will need to select your subscription, name your resource group and select a region.

Create Azure Resource Group

Once you have your resource basics configured, click Review + create. Azure will perform some checks and when your validation passed, you can click Create to create your new resource group.

Create Azure Resource Group Pass

This may take a minute but once completed, you will get a notification confirming that your resource group was created.

Create Azure Resource Group Confirm

Create Storage Account

Once you have your resource group configured, the next step is to add a storage account to that same resource group.

From the resource group screen, click Create. The Marketplace will open where you can search for “storage” and click Create Storage account from the Storage account option available (it’s the one with the green calendar-looking icon).

Resource Group Create Marketplace Search

The Create a storage account screen will require some more details similar to the resource group. Select your subscription and the resource group that you created in the previous step. You will need to name your storage account and select a region. Make a note to use the same region for your storage account as you did for your resource group. Your selection for performance and redundancy will vary based on your needs but for basic purposes, let's leave these configured as the default Standard and Geo-redundant storage (GRS) options. Once you have your storage account details entered, click Review.

Create Storage Account Details

Confirm your details on the review tab and click Create.

Review Storage Account Creation

Azure will begin the deployment of your new storage account and once completed you will be notified on screen. From here, click on Go to resource to go to your storage account.

Storage Account Deployment Complete

Create Storage Container

After you have your storage account set up, navigate to the storage account resource and in the sidebar of your storage account below Data storage, you will see Containers. Click Containers and + Container. This will open a modal where you can name your new container and set the public access level to Blob. Once configured, click Create.

Create Container

When your new container has been created, you will see it in the list of containers on the screen.

Save Storage Container Connection String

Now that we have the resources needed to be configured in Azure, we need to grab the connection string for our storage container. The connection string can be found in the Access keys area located on the sidebar below Security + networking. From here, show and copy the connection string for your storage container.

Access Keys Connection String

Configure Umbraco Solution

The hard part is done! Now to configure our Umbraco solution.

Install Umbraco.StorageProviders.AzureBlob NuGet Package

Using the NuGet package manager or dotnet CLI you will need to install the Umbraco.StorageProviders.AzureBlob package.

OPTION 1: Install via CLI

dotnet add package Umbraco.StorageProviders.AzureBlob

OPTION 2: Install via NuGet Package Manager

PM> Install-Package Umbraco.StorageProviders.AzureBlob

Add Connection String to AppSettings.json

Next, we need to add the connection string and the name of the container to the appsettings.json file.


{
	"Umbraco": {
	    "Storage": {
	      "AzureBlob": {
	        "Media": {
	          "ConnectionString": "PasteYourConnectionStringHere",
	          "ContainerName": "PasteYourContainerNameHere"
	        }
	      }
	    }
	  }
}

appsettings.json file with azure connection string and container name example

Update ConfigureServices Method in Startup.cs

Lastly, in the startup.cs file we need to add .AddAzureBlobMediaFileSystem() to the ConfigureServices method. This should be added before the .Build() is called.


public void ConfigureServices(IServiceCollection services)
{
    services.AddUmbraco(_env, _config)
        .AddBackOffice()
        .AddWebsite()
        .AddComposers()
        .AddAzureBlobMediaFileSystem()
        .Build();
}

startup.cs file configureservices method example

Add Media To Your Website

Now that everything is configured, you are ready to start your website and add media to the media section. Run your project and login to the backoffice. Once logged in, navigate to the Media section and upload an image.

Umbraco Media Section Uploads

From the backoffice user’s perspective, no changes will happen and your media metadata will still display the same on the Info Content App.

Umbraco Media Section Upload Info

Explore Your Azure Media

In your file system, you will notice that the media folder is actually empty. In order to browse your media on your computer you can utilize a free tool called Azure Storage Explorer. Once you have downloaded this tool you will need to login with your azure account. Make sure to keep your connection string handy, since you will need that information as well.

You also have the option to open Azure Storage Explorer from your storage account. You can click Open in Explorer, which will also help get you set up with Azure Storage Explorer.

Storage Accsount Open In Explorer

After logging into your Azure account you can expand the items in your explorer view to view and manage your media files. You will need to drill down within your Subscription > Storage Account > Blob Container to display the cache and media folders available in your blob storage. The media folder is where your media can now be found.

Azure Storage Explorer Media

More Resources

Hopefully this guide will be helpful in your mission to configure Umbraco for use with Azure blob storage. The Umbraco configuration itself is pretty straightforward however, there are some slight differences between versions and you can find updated documentation for versions 10+ on the new docs.umbraco.com site and legacy documentation over on Our.


Tech Tip: JetBrains Rider

Check it out here